TL;DR
Shotstack ships an official MCP server. That means you can connect it directly to Claude Desktop, Claude Code, Cursor, ChatGPT, Antigravity, or any other MCP-aware client, and create or render videos by chatting — no hand-written JSON timelines, no manual API calls.
This guide covers:
- Connecting Shotstack’s MCP server to Claude Desktop.
- What actually happens when you ask Claude to make you a video.
- An overview of the same setup in Cursor, Claude Code, ChatGPT, and Antigravity. We’ll give the configuration and any key caveats for each, without repeating the full walkthrough.
- When to reach for MCP vs. Shotstack’s direct API vs. the Shotstack CLI and Claude Code Skill.
At a high level, the pieces fit together like this:

Your assistant talks to Shotstack’s MCP server, which talks to Shotstack’s actual rendering infrastructure. Which path the assistant takes — opening Studio for an interactive preview, or rendering straight through to a URL — can vary even with the same prompt. Both paths are covered below, along with how to steer toward the one you want.
What you’ll need
- A Shotstack account and API key — sign up at app.shotstack.io
- Claude Desktop (any plan, including free)
- Optionally, Cursor Pro if you want to follow the Cursor section (Cursor’s free Hobby plan doesn’t support MCP)
Node.js is not required for the primary setup — Shotstack’s MCP server runs remotely and your client connects to it over HTTP with OAuth. You only need Node.js if you’re using the local stdio fallback described at the end of the Claude Desktop section.
Both sandbox and production keys work with the MCP server. Sandbox renders don’t consume credits but carry a watermark — useful while you’re getting set up. (You’ll need at least one credit in your account to use the sandbox, and AI-generated assets always consume credits, even in sandbox.) Production renders use credits; new accounts start with 10 free credits (1 credit = 1 minute of rendered video), valid for 30 days. Keep your first few test clips short either way.
What is MCP, and why does it matter here?
MCP — the Model Context Protocol — is an open standard (now governed by the Agentic AI Foundation under the Linux Foundation) for connecting AI assistants to external tools and data. Instead of an assistant only being able to talk about something, MCP gives it a defined set of tools it can actually call.
For a video-rendering API, this is a natural fit. Shotstack’s API has a small set of well-defined operations — start a render, check on a render, manage a template — and a structured input format (a JSON timeline) underneath all of it. That’s exactly the shape MCP tools are good at wrapping. Once Shotstack’s MCP server is connected, your assistant doesn’t need you to write that JSON by hand; it calls the right tool with the right arguments, based on what you asked for in plain English.
What tools does Shotstack expose through MCP?
Before the first render, it helps to know what’s actually available. Note that Shotstack’s MCP server is currently in beta, so be sure to check the docs when using the tool, in case anything changes. The ones that matter most for this guide are:
studio— opens an interactive editing canvas inside your chat, loaded with an existing edit. Depending on the run, the assistant may call this upfront or offer it after a direct render, giving you a chance to adjust timing, text styling, or clip positions before finalizing.render_video— kicks off a render directly from a timeline, returning a render ID immediately. You may get this first, or after a Studio session.get_render_status— checks on a render’s progress, and returns the output URL once it’s done.
Alongside these, Shotstack also exposes:
- Five template-management tools (
create_template,list_templates,get_template,render_template,delete_template) for working with reusable video templates create_studio_link, for generating a shareablehttps://shotstack.studio/s/{slug}link to an editor sessionget_shotstack_guide, which pulls in Shotstack’s own Edit JSON authoring conventions — useful if your assistant seems unsure how to structure a request
You don’t need to memorize this list. The point is simpler: Claude isn’t “magically editing video”. Every action it takes maps to one of these typed tools, calling Shotstack’s real rendering infrastructure underneath.
Connect Shotstack to Claude Desktop
Shotstack’s recommended way to connect to Claude Desktop is via the built-in Connectors panel, using OAuth — no config file editing, no Node.js required. A local fallback option is covered at the end of this section.
1. Get your API key
Log in at app.shotstack.io and grab your API key — either sandbox or production works.
2. Connect via Connectors
Custom Connectors enable you to connect Claude to various tools and data sources.
To connect Claude Desktop to the Shotstack MCP, go to Customize → Connectors (previously, this was found in Settings → Connectors → Add custom connector).
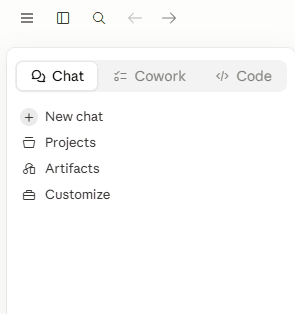
Click the + button next to Connectors and select Add custom connector.
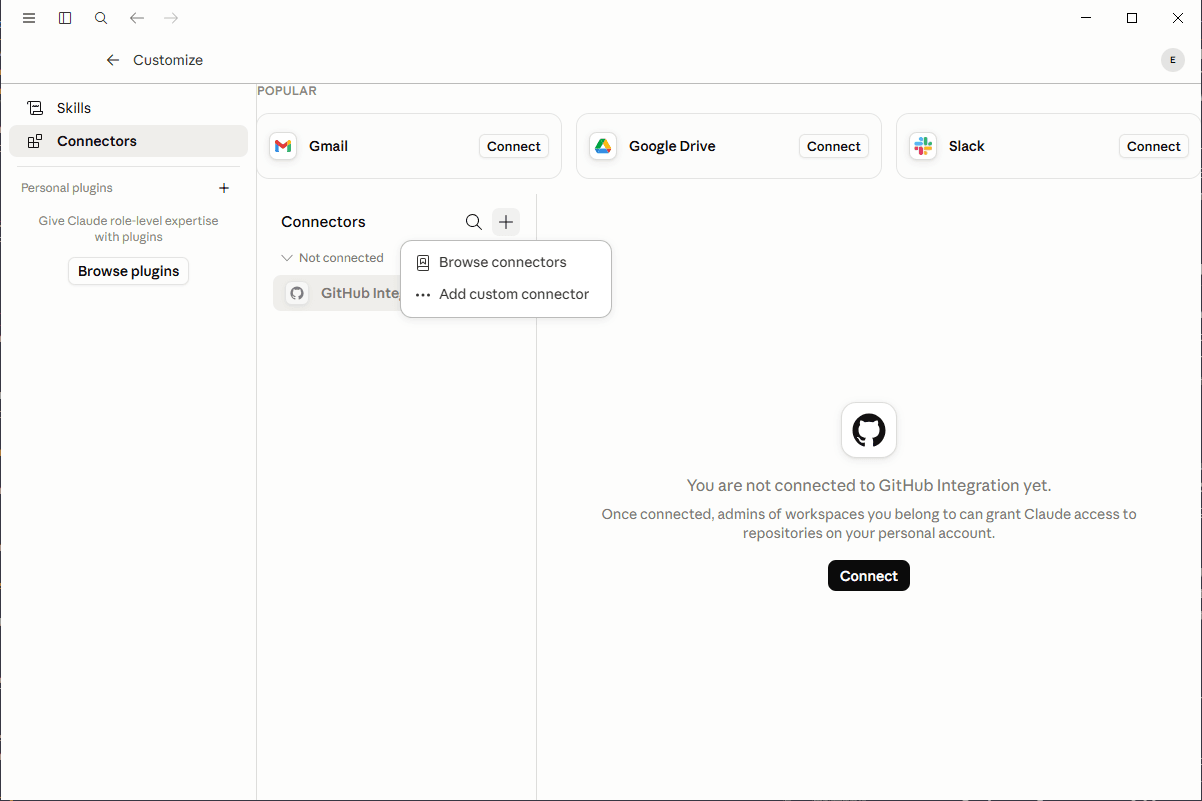
Enter a name for the custom connector (I named mine “Shotstack MCP”) and enter the URL:
https://mcp.shotstack.io/
When you add the connector, the Connectors window will show you that “You are not connected to Shotstack MCP yet”. Click on the Connect button and then complete the OAuth flow in the browser window that opens with your Shotstack account details. That’s it — no JSON to edit, no restart needed. Claude authenticates against Shotstack’s hosted MCP server directly.
After connecting, you should see Shotstack MCP listed as a connected server, with its tools (studio, render_video, get_render_status, and the rest) available.
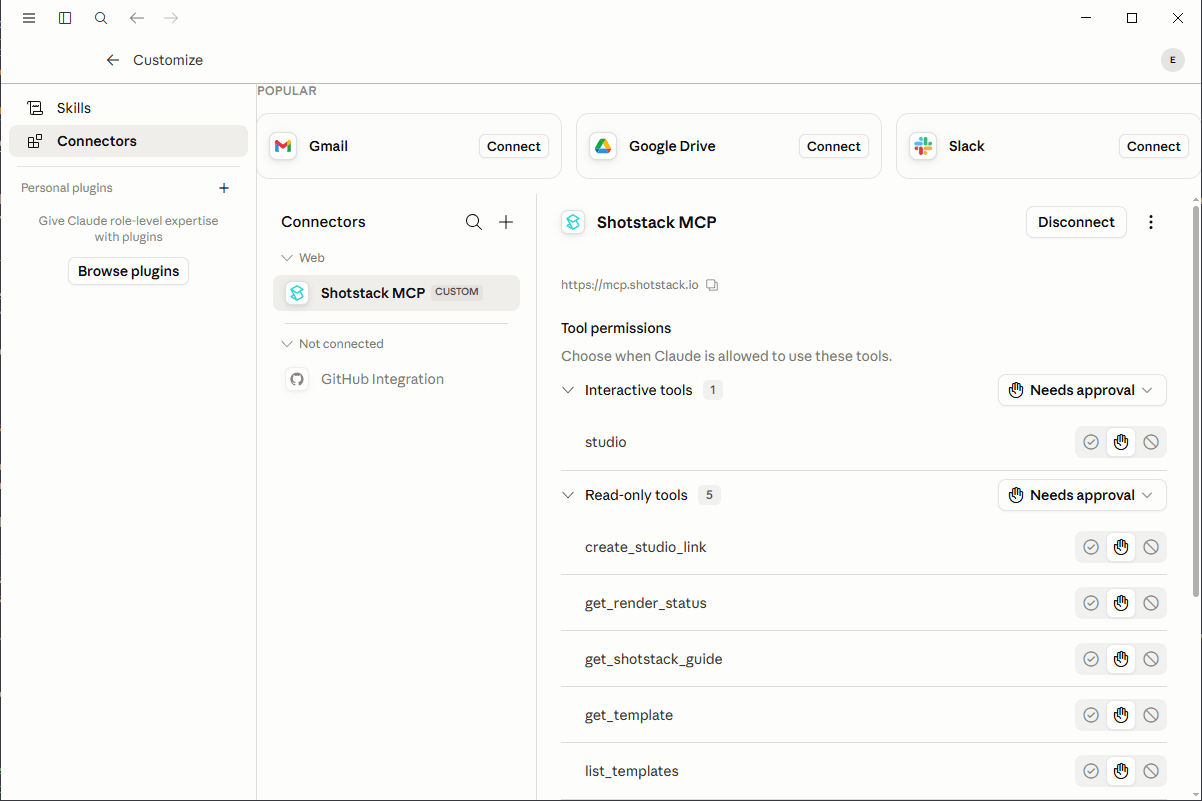
If you don’t see it, jump to the FAQ — authentication and “tool not showing up” issues are the most common causes.
Local stdio fallback
If you’d rather not use OAuth — for offline use, or if your specific Claude Desktop version doesn’t yet show the Connectors panel — you can run the MCP server locally instead. Shotstack’s own docs label this as a fallback, not the preferred path.
You’ll need Node.js installed first. Then open (or create) your Claude Desktop config file:
- macOS:
~/Library/Application Support/Claude/claude_desktop_config.json - Windows:
%APPDATA%\Claude\claude_desktop_config.jsonor%LOCALAPPDATA%\Packages\Claude_pzs8sxrjxfjjc\LocalCache\Roaming\Claude\claude_desktop_config.json
Windows note: On Windows, which path applies depends on your installation. If you’re unsure, use Settings → Developer → Edit Config and note which file it opens — that’s the one the app reads.
Add the Shotstack MCP server entry:
{
  "mcpServers": {
    "shotstack": {
      "command": "npx",
      "args": ["-y", "@shotstack/shotstack-mcp-server"],
      "env": {
        "SHOTSTACK_API_KEY": "your_api_key"
      }
    }
  }
}
Replace your_api_key with your sandbox or production key, save the file, and restart Claude Desktop — config changes aren’t picked up until it restarts.
A quick note on permissions and cost
Before you ask Claude to do anything, it’s worth knowing what you’ve just connected.
Whether you connected via OAuth or a local API key, every render tool call Claude makes goes through Shotstack’s API. If you’re using a production key, that means real credits. If you’re on a sandbox key, renders are free but watermarked — helpful for testing before you commit production credits.
Because of this, Claude (and most MCP clients) will ask for your approval before calling a tool for the first time. This isn’t Claude being cautious specifically about video — it’s the standard MCP permission model. Any tool that can take a real-world action gets a confirmation step before it runs.
It’s worth glancing at what’s being approved, especially for render_video and render_template — those are the ones that spend credits. get_render_status, by contrast, just checks on something that’s already running and doesn’t cost anything extra.
If you’re on a production key, keep test renders short, and don’t queue up a dozen 60-second renders while you’re getting set up. If you’re still on a sandbox key, renders are free — but you’ll see a watermark on the output.
The moment it works
This is the part you’ve been waiting for. Here’s what actually happens — based on a live test — when you give Claude a natural-language video prompt.
Note that AI prompts usually return a non-deterministic result. Meaning, the same prompt might return different results. In my testing, the first time I ran the prompt shown below, Claude called Shotstack to render the video and polled for the render status, then gave me the link to the rendered video. It then gave me an option of opening the video up in the embedded studio editor for me to tweak the video and render the new edit. On another run with the same prompt, Claude immediately opened the studio editor, giving me a chance to edit the video and save the edited render to Shotstack. So the two steps below might not happen exactly as stated.
Step 1: Claude renders and returns a URL
Open a new chat and try something like:
Create a 15-second video about the earth. Use this script:

"From far enough away, it looks impossibly small. A blue marble, suspended in nothing, wrapped in a thin film of air that somehow holds back the vacuum of space.
Everything that has ever happened — every birth, every war, every sunrise anyone has ever seen — happened here, on this one small sphere of rock and water.
We call it Earth. It might be better to call it a miracle."

Use this clip: https://shotstack-assets.s3-ap-southeast-2.amazonaws.com/footage/earth.mp4 as the visual, with this background music: https://shotstack-assets.s3-ap-southeast-2.amazonaws.com/music/freepd/motions.mp3"
Claude calls render_video directly. Here’s what happens under the hood:
render_videosends your timeline to Shotstack’s render API and immediately returns a render ID with a status ofqueued— not a finished video. Rendering takes real time (typically tens of seconds, depending on length and complexity), so this step is intentionally asynchronous.- The assistant then calls
get_render_status, passing in that render ID. The status moves throughqueued→fetching→rendering→saving→done(orfailedif something went wrong). - Once the status is
done,get_render_statusreturns the output URL — a hosted link to your finished video. Here’s the video from this run:
Claude handles the polling for you — it calls get_render_status until the status flips to done, then hands you the link along with a description of what it built:
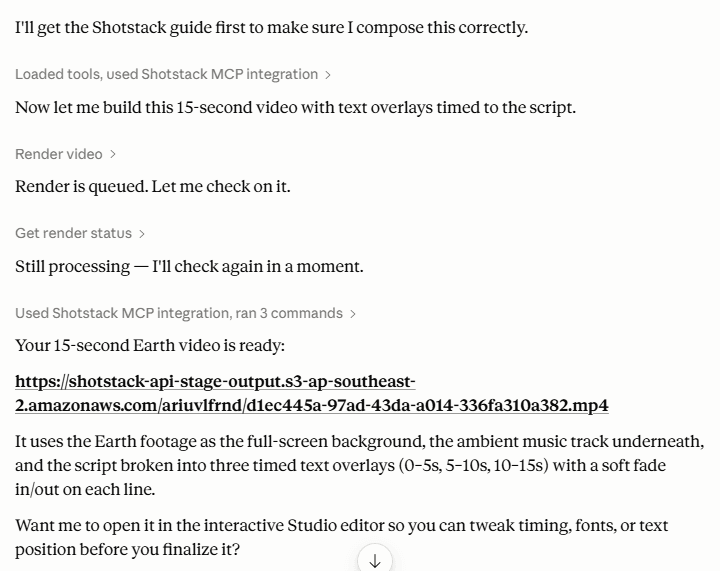
Step 2: Open it in Studio (optional)
After the render, Claude offers to open the edit in the Studio editor. Say “yes”, and Claude calls the studio tool — which opens an interactive canvas directly inside Claude Desktop:
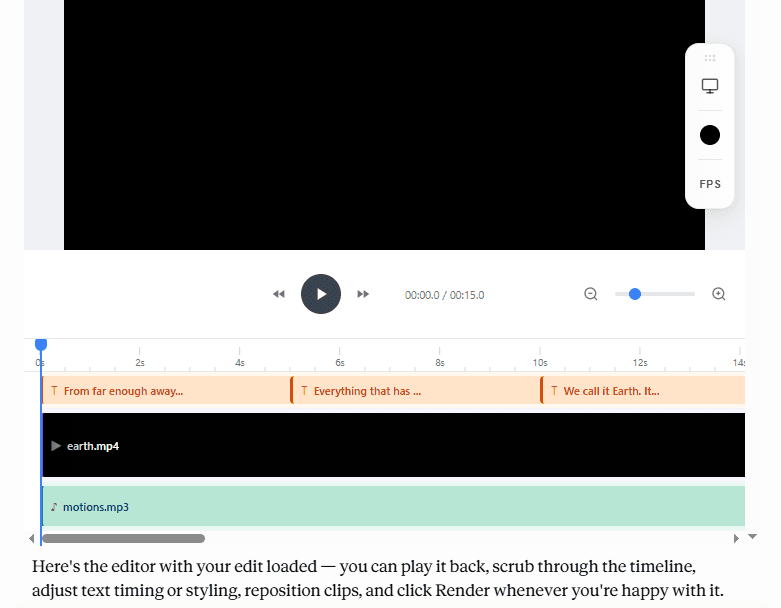
From here you can scrub through the timeline, nudge text positions, adjust font or timing, swap clips — then click Download to render and download the edited video. Despite the label, the video isn’t downloaded to your computer — it renders on Shotstack’s servers and appears in your dashboard when done. This step is entirely optional; if you’re happy with what came back from step 1, you don’t need to open Studio at all.
The two steps are independent. You can render first and skip Studio entirely, or you can use create_studio_link to get a shareable URL to the editor instead of the inline embed — useful if you want to hand the edit to someone else to finalize.
Connect Shotstack to Cursor
Cursor connects to Shotstack’s hosted endpoint the same way most modern MCP clients do — via the URL, with no local server needed. Add the following to ~/.cursor/mcp.json (applies across all your projects) or to .cursor/mcp.json in a specific project’s root (scoped to that project only):
{
  "mcpServers": {
    "shotstack": {
      "url": "https://mcp.shotstack.io/"
    }
  }
}
Reload or restart Cursor, then check its MCP settings panel — shotstack should appear as a connected server. Cursor handles authentication via OAuth when you first use a Shotstack tool.
Cursor Pro required. Cursor’s free Hobby plan doesn’t include MCP support. Pro ($20/month) is the minimum plan that includes MCP, along with Cursor’s agent features. If you’re on Hobby, this section won’t work until you upgrade.
From here, everything from the Claude Desktop section applies: the same prompts, the same studio / render_video / get_render_status mechanics, the same permission prompts. Cursor is just a different client talking to the same MCP server.
Claude Code
If you spend most of your time in the terminal, Claude Code can connect to Shotstack’s hosted MCP server with a single command:
claude mcp add --transport http shotstack https://mcp.shotstack.io
This connects Claude Code to the same hosted Shotstack MCP server via HTTP, using OAuth for authentication. The same tools and permission prompts apply.
For the studio tool specifically — interactive rendering depends on client support, and a terminal is less likely than a GUI chat client to display an inline preview. For terminal workflows, the direct render path (render_video → get_render_status) or asking for a Studio link to open in a browser is the more practical option.
If you’re already using the Shotstack CLI, you can also install Shotstack’s Claude Code Skill, which teaches Claude Code how to use the CLI and how to author Edit JSON correctly:
npx skills add shotstack/shotstack-cli
The skill and the MCP server share the same underlying Edit JSON conventions — they’re two different integration points for the same API.
Antigravity
Google Antigravity is Google’s agent-first IDE. It supports MCP servers over HTTP, and connecting Shotstack takes one config file edit.
Antigravity’s MCP configuration is shared across Antigravity 2.0, the IDE, and the CLI — all three read from the same file:
~/.gemini/config/mcp_config.json
On Windows, this is at C:\Users\[username]\.gemini\config\mcp_config.json.
To access it from within Antigravity IDE, open the … menu at the top of the agent panel → MCP Servers → Manage MCP Servers → View raw config.
Add Shotstack to the mcpServers object:
{
  "mcpServers": {
    "shotstack": {
      "serverUrl": "https://mcp.shotstack.io/"
    }
  }
}
Important: Antigravity uses
serverUrlfor remote HTTP-based MCP servers, noturl. This is different from theurlkey used in Cursor and VS Code configs — use the wrong key and the server won’t connect.
Save the file, then authenticate:
- Open Antigravity’s Settings (Cmd+, on Mac, Ctrl+, on Windows/Linux)
- Navigate to Customizations
- Under Installed MCP Servers, click Refresh — shotstack should now appear
- Click Authenticate next to shotstack and complete the OAuth flow in the browser window that opens
Shotstack’s MCP server supports dynamic client registration, so Antigravity handles the OAuth flow automatically — you won’t need to configure client credentials manually.
Once authenticated, you can use Shotstack tools in Antigravity’s agent panel the same way you would in Claude Desktop: describe the video you want, and the agent will call studio, render_video, or get_render_status as needed.
If authentication doesn’t complete or the server shows as disconnected, check Antigravity’s known issues — OAuth support for HTTP MCP servers has been an active area of work.
ChatGPT
ChatGPT can also connect to Shotstack’s hosted endpoint. First enable Developer mode under Settings → Security and login (on Business, Enterprise, and Edu workspaces this is admin-gated under Workspace Settings → Permissions & Roles). Then go to Settings → Plugins (or chatgpt.com/plugins), click +, and create the app with a name — e.g. “Shotstack MCP” — and https://mcp.shotstack.io/ as the MCP server URL.
On plan requirements: OpenAI’s docs state that full MCP support including modify/write actions is rolling out in beta to Business, Enterprise, and Edu plans, and that functionality and permissions may change. At the time of writing, I tested it with the free plan and it worked — including a full render and Studio session.
Remember what was said earlier about non-deterministic outputs when it comes to AI. For testing, I ran the same prompt as shown earlier with Claude Desktop, twice. On the first run, ChatGPT told me that the video had been queued and gave me a Render ID, it didn’t open the studio interface. I asked it to check the render status again, and when it checked, it told me that the render had completed successfully and gave me the link to the video. The output video was different from the one that Claude gave me with the same prompt. It ran a little longer than 15 seconds, had a zoom effect and had an AI-generated voiceover:
In a new chat, I ran the same prompt again and this time the studio interface was opened and the rendered video was the same as the one I got with Claude — 15 seconds long with no voiceover.
When using AI models, you should be aware that sometimes they can be more interpretive with natural-language prompts, and their creative decisions can vary between runs even with the same prompt. If you want specific output (text overlays only, no added TTS, exact duration), be explicit in your prompt rather than leaving room for interpretation.
MCP vs. the direct API vs. the Shotstack CLI
By this point you’ve got Shotstack wired into your chat client via MCP. But MCP isn’t the only way to bring AI and Shotstack together — and it’s not always the right one. Here’s how the three approaches compare:
| MCP (this guide) | Direct API | Shotstack CLI / Claude Code Skill | |
|---|---|---|---|
| What it is | Shotstack’s MCP server, connected to an AI chat client (Claude, Cursor, etc.) | Shotstack’s REST render API, called from your own code | A terminal CLI for the Edit API, plus a Claude Code Skill packaging the same conventions for IDE agents |
| Best for | Ad-hoc creation, exploring ideas, one-off renders, non-developers already using Claude/Cursor | Production pipelines, full control over timelines, server-to-server automation | Terminal-native workflows, CI/CD pipelines, validating Edit JSON before spending credits |
| Setup | OAuth connector or npx config + API key (minutes) | API key + your own HTTP integration | npm install -g @shotstack/cli + shotstack login; Claude Code Skill via npx skills add |
| Who decides what to render | The assistant, from your natural-language prompt | Your code | The CLI (with --watch); the agent via the Skill |
| Output | Rendered video / interactive Studio preview, in your chat | Render ID via polling or webhook, handled by your code | Direct URL printed to terminal, or Studio link opened in browser |
If what you actually want is a fully autonomous “AI video agent” — one that goes from idea to published video with no human in the loop — the Shotstack CLI is designed for that use case, especially its --watch flag and validate command for offline schema checking before spending credits. See how to build an AI video agent for a full walkthrough. For more on what those pipelines look like under the hood, see how an agentic video-editing pipeline works and Shotstack’s broader agentic video editing overview.
If you’re integrating Shotstack into an existing application, Shotstack’s API documentation is still the foundation that MCP itself sits on top of — MCP just gives an AI assistant a natural-language front end to the same endpoints.
MCP earns its place in the middle: you, chatting with an assistant you already use, getting a video made or edited without writing any integration code at all.
Start rendering from your chat
That’s the whole setup — one connector (or one config block), and your AI assistant can render real videos through Shotstack’s rendering infrastructure. Sign up for a free Shotstack API key and try the prompt from this guide — sandbox renders won’t cost you anything while you experiment, and the same account works across Claude Desktop, Cursor, Claude Code, ChatGPT, and Antigravity.
Frequently asked questions (FAQs)
Do I need a special API key for MCP?
No — both sandbox and production keys work. For the OAuth connector setup, a browser will open where you’ll authenticate with your API Key. For the local stdio fallback, you set the key as SHOTSTACK_API_KEY in your config. Get either key from app.shotstack.io under API Keys. If the key is missing or invalid, tool calls fail with an authentication error, which the assistant will typically surface to you directly.
Should I use a sandbox or production key?
Use your sandbox key while you’re getting set up — sandbox renders are free (except AI-generated elements) and the only downside is a watermark on the output. Switch to your production key when you’re ready for clean output. Production renders use credits; new accounts start with 10 free credits (10 minutes of rendered video), valid for 30 days.
What are the rate limits?
Shotstack does not currently document a separate MCP-specific rate limit. Treat your account’s normal API, credit, and concurrency limits as the source of truth, and confirm current limits in your dashboard or plan documentation before using MCP for high-volume rendering.
I connected Shotstack, but Claude doesn’t show the tools. What’s wrong?
For the OAuth connector: try disconnecting and reconnecting, and make sure the OAuth flow fully completed — an interrupted auth flow can leave the connector in a broken state. For the local stdio fallback: the most common causes are a JSON syntax error in the config file (validate it with a JSON linter); the client wasn’t restarted after editing the config; or you edited the wrong config file. On Windows with an MSIX install, the file your client reads is under %LOCALAPPDATA%\Packages\Claude_pzs8sxrjxfjjc\LocalCache\Roaming\Claude\, not %APPDATA%\Claude\ — see the Windows note in the setup section above. Use Settings → Developer → Edit Config to open up the directory with the config file you should use.
I’m getting an error about npx or Node not being found.
This applies to the local stdio fallback only. Make sure Node.js is installed and npx is on your PATH. As a sanity check, try running npx -y @shotstack/shotstack-mcp-server directly in a terminal — if that doesn’t start cleanly, the issue is your Node setup, not the client config.
The tool shows up, but my render fails.
The most common cause is media URLs that don’t actually exist. If you’re referencing your own images, video, or audio, host them somewhere public first and give the assistant the real HTTPS URL — don’t leave it to guess. Also double-check that your API key is valid.
I got a render ID back, but no video URL. Is something broken?
No — that’s expected. render_video returns immediately with a queued status, not a finished video; rendering takes time. The assistant needs to call get_render_status (often more than once) until the status reaches done, at which point the output URL appears. If it seems stuck, just ask “is it done yet?” or “check the render status”.
When should I use a template instead of a full timeline?
If you’re making the same style of video repeatedly with different content — say, a product showcase you reuse for different products — Shotstack’s template tools (create_template, render_template, etc.) let the assistant fill in a pre-built design rather than constructing a full timeline from scratch each time. For one-off or highly custom videos, render_video with a full timeline (or the studio tool for an interactive build) gives you more flexibility.
Why does Claude/Cursor ask me to approve tool calls?
This is standard MCP behavior, not something Shotstack-specific: any tool that can take a real action — and rendering a video spends real credits — requires your approval before it runs, at least the first time in a conversation. Worth glancing at what’s being approved (especially render_video/render_template) so you’re not surprised by credit usage.
What’s the difference between the OAuth connector and the local stdio fallback?
The OAuth connector (the primary setup in this guide) connects your client to Shotstack’s hosted MCP server over HTTP, authenticating via OAuth. Nothing runs locally, no API key sits in a config file, and it works on every Claude Desktop plan. The local stdio fallback runs the Shotstack MCP server on your own machine via npx, communicating over stdio, authenticated with an API key in your config file. Functionally, both expose the same tools — the OAuth path is simpler to set up and is what Shotstack’s own docs recommend first.
Does this work on the free plan?
Depends on the client. Claude Desktop’s OAuth connector setup works on every plan, including free — though free accounts are limited to one custom connector. Cursor requires Pro — the free Hobby plan doesn’t support MCP at all. ChatGPT docs say that it requires a Business, Enterprise, or Edu workspace for Developer mode, but I was able to test out the whole workflow on a free plan. Antigravity’s docs list no plan restriction for MCP — the free tier included.
Get started with Shotstack's video editing API in two steps:
- Sign up for free to get your API key.
- Send an API request to create your video:
curl --request POST 'https://api.shotstack.io/v1/render' \
--header 'x-api-key: YOUR_API_KEY' \
--data-raw '{
  "timeline": {
    "tracks": [
      {
        "clips": [
          {
            "asset": {
              "type": "video",
              "src": "https://shotstack-assets.s3.amazonaws.com/footage/beach-overhead.mp4"
            },
            "start": 0,
            "length": "auto"
          }
        ]
      }
    ]
  },
  "output": {
    "format": "mp4",
    "size": {
      "width": 1280,
      "height": 720
    }
  }
}'

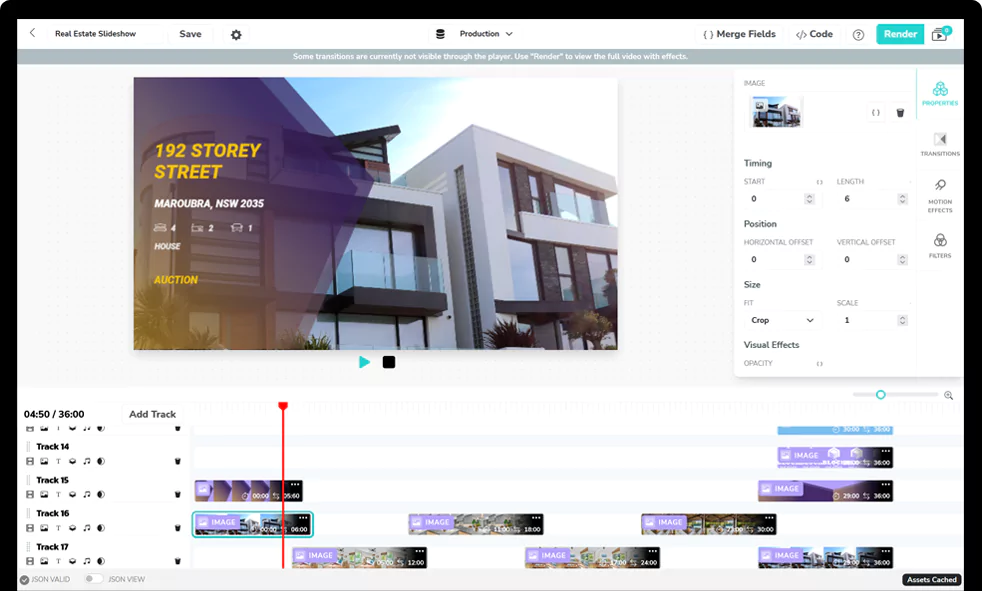
Experience Shotstack for yourself.
- Seamless integration
- Dependable high-volume scaling
- Blazing fast rendering
- Save thousands