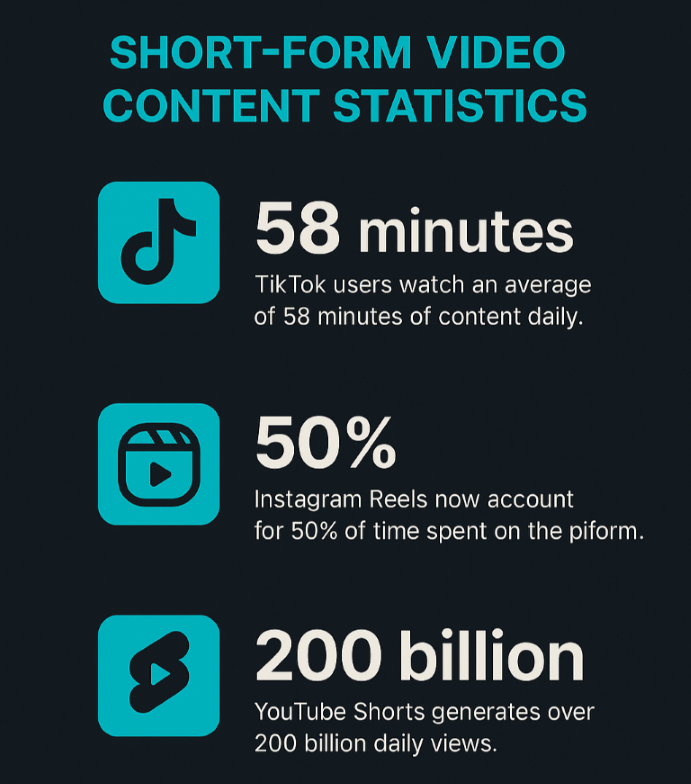
In the time it took you to read this sentence, millions of short-form videos were watched across the world. TikTok users watch an average of 58 minutes of content daily. Instagram Reels now account for 50% of time spent on the platform. YouTube Shorts generates over 200 billion daily views. Today, attention isn’t just gained, it’s won through relentless volume and perfect consistency. This is why so many marketing and content teams are now asking their developers how to automate shortform videos.
Truth is, at traditional production speeds, where a single 30-second video takes 2-4 hours to produce, you’d need a full-time video editing team working around the clock just to keep up.
But what if you could produce 100 videos in the time it takes to manually edit one?
That’s what we tackle in this guide. Here’s the TL;DR:
- Why automate? To compete today, you need a high volume of consistent video content. Manual editing can’t keep up. Automation saves hundreds of hours, cuts costs dramatically, and allows for real-time video creation.
- How to automate shortform videos: There are four paths, each with its own trade-offs:
- Template Platforms (Canva, Pictory): Best for beginners testing ideas. Visual, but creatively limited and expensive at scale.
- No-Code Workflows (n8n, Zapier): Ideal for connecting video generation to existing business processes (e.g., “new blog post > create video”).
- Custom FFmpeg Scripts: For teams with deep engineering talent who need absolute control and have unique requirements that no platform can meet.
- Video APIs (Shotstack): The most scalable solution. It turns video creation into a programmatic function, perfect for high-volume production, SaaS app integration, and e-commerce.
Why you need automatic short form content in 2025
Here are some reasons why you might need to automate video editing:
- Algorithm advantage: Platform algorithms reward consistent posting schedules with exponentially greater reach. Brands that have adopted video automation are scaling their content output (and reach) 10-100x while their competitors struggle with manual production bottlenecks. On Instagram alone, Reels get 1.36x and 2.25x more reach than carousels or single images, respectively.
- The economics are compelling: Manual video production costs $50-500 per video when you factor in editor time, software licenses, and project management overhead. Automated approaches drop that cost to $0.50-5 per video. And then there’s the selling power of shortform video. Sixty-two percent of users become more motivated to try a brand or product after seeing it in Facebook Stories.
- Real-time responsiveness: Automation allows you to generate videos based on real-time triggers instantly. A new product goes live on your e-commerce store? A video is automatically generated and posted. Breaking news hits? A video summary is created from the article in minutes, allowing you to capture attention at the right moment.
- New revenue streams for SaaS: You open the door to entirely new possibilities by turning video creation into a programmatic function. You can build tools that enable user-generated content campaigns, launch services that provide personalized sales videos at scale, or integrate automated video features directly into your product.
The question isn’t whether to automate video. It’s how to get started.
What are the methods to automate shortform video production?
You can automate your shortform videos using various methods, but for this guide, we will discuss the following 4:
- Using template-based platforms such as Canva or Invideo
- Using no code platforms such as n8n with video generation and AI tools
- Using custom FFmpeg scripts
- Using a video generation and editing API to programmatically generate shortform videos.
Your Automation Options
| Method | Best For | Technical Skill | Volume Range |
|---|---|---|---|
| Template Platforms | MVPs, visual teams | None | <100/mo |
| No-Code Workflows (n8n) | Connected pipelines | Low-Mid | 100–500/mo |
| FFmpeg Scripts | Custom render logic, total control | Very High | Varies (infra-bound) |
| Video API Platforms (e.g., Shotstack) | Scalable, programmatic automation | Low-Mid | 100s to 1,000,000s/mo |
Before you begin, you need to choose the right method for your use case. Here’s how you choose your approach:
- Start with templates if you’re testing concepts with low volume and no developers.
- Use workflow tools if you’re connecting video to existing automation and producing medium volume.
- Build custom scripts if you have unique requirements, strong technical capabilities (with a dedicated video team), and video is core to your product.
- Adopt API-first if you’re scaling to hundreds or thousands of videos, and video is complementary to your product or service.
Method 1: Automating short-form content with template-based platforms
What You’ll Need:
- Account on a template platform (Canva, InVideo, Lumen5, or Pictory)
- Spreadsheet with your video data (CSV or Google Sheets)
- Media assets organized (images, logos, or video clips if not using stock)
Template-based platforms offer the lowest barrier to entry. You work within a drag-and-drop editor to design a video template with variable fields (placeholders for text, images, or video clips) that change with each render. Once your template is ready, you upload a CSV or spreadsheet containing your variable data, and the platform generates multiple video variants automatically.
These platforms excel at simple compositions: text overlays on stock footage, image slideshows with music, or basic product announcements. The workflow is visual and intuitive. You see exactly what you’re building.
Pros:
Template platforms excel for social media announcements with text variations, simple product showcases, and testing automation concepts. They’re ideal when producing under 100 videos monthly and when your team has no developers.
Cons:
- You’ll hit creative ceilings quickly. Complex animations, conditional logic (showing different scenes based on data), and dynamic duration adjustments aren’t possible.
- Volume pricing scales poorly, and generating 1,000 videos may cost hundreds of dollars in render credits.
- Integration requires manual CSV exports rather than automatic data syncing.
Method 2: Short form video content automation with no code workflow tools
What you’ll need:
- Account on Zapier, Make (Integromat), or n8n
- Video generation platform account (AI video generator or a video API like Shotstack)
- Data source (Google Sheets, Airtable, CMS, etc.)
Automation workflow builders like Zapier, Make, and n8n sit between your data sources and video generation platforms. They connect disparate systems without requiring code. The paradigm is simple: when X happens (trigger), do Y (action). A new row appears in your spreadsheet? Generate a video and post it to Instagram. A blog post has been published? Create a video summary and share it on YouTube.
Tools like n8n offer particularly powerful flexibility for connecting to video APIs. You can send HTTP requests directly to platforms like Shotstack, defining video structure through JSON payloads and handling asynchronous rendering workflows with visual logic.
Watch this tutorial demonstrate the complete process: submitting render requests, polling for completion status, and retrieving the final video URL, all without writing traditional code.
Pros:
- Automation tools connect multiple systems seamlessly. Event-driven workflows mean videos generate automatically based on real-world triggers—RSS feed updates, form submissions, calendar events, or database changes. The visual workflow design makes complex multi-step processes manageable for non-developers.
- For teams already using automation platforms, adding video generation becomes an incremental capability rather than a separate project. You can orchestrate sophisticated sequences: fetch data from your CMS → generate video → upload to social platforms → notify your team in Slack.
Cons:
- You’re dependent on platform API capabilities. If Zapier doesn’t support a specific video platform feature, you can’t access it through the integration. Per-operation costs accumulate at scale—each step in your workflow consumes credits. Debugging complex multi-step workflows with multiple conditional branches becomes challenging when something breaks.
- Latency in chained operations means videos take longer to produce compared to direct API integration. Each handoff between services adds processing time.
Best use cases:
Automation tools excel at medium-volume workflows (100-500 videos monthly) where you need to connect video generation to existing business processes. Blog post → video summary pipelines, product update → announcement video workflows, and event-triggered video creation all fit naturally. They’re particularly valuable for teams already invested in no-code automation stacks who want to add video without bringing in developers.
Method 3: Custom scripts with FFmpeg
For teams with deep programming expertise, writing custom scripts that drive open-source rendering tools offers complete control. Python or Node.js scripts use libraries like FFmpeg, MoviePy to programmatically compose and render videos. You define every aspect of the composition in code (timing, transitions, effects, audio mixing), then execute the script to generate output files.
This is self-hosted infrastructure. Your scripts run on your own servers (or cloud instances), giving you full control over the rendering environment.
Pros:
- Creative freedom is absolute. No template limitations. No platform constraints. If you can imagine it, you can code it. Per-video costs approach zero after the heavy initial infrastructure investment because you’re only paying for server compute time and storage.
- Data privacy is guaranteed. Sensitive content never leaves your infrastructure, critical for regulated industries or proprietary material. Open-source flexibility means you can modify every aspect of the rendering pipeline to suit your exact requirements.
Cons:
- The learning curve is steep. You need programming expertise plus deep knowledge of video codecs, frame rates, audio synchronization, and rendering optimization. Infrastructure is now entirely your problem. You are responsible for provisioning servers, managing fragile GPU drivers, architecting storage solutions, handling security, and debugging obscure FFmpeg errors.
- Scaling horizontally (distributing renders across multiple machines) introduces architectural complexity. Software updates and dependency management create an ongoing maintenance burden. When FFmpeg releases a new version or a library introduces breaking changes, your scripts break.
Best use cases:
Custom scripting works for teams with unique visual requirements that no platform supports, organizations with on-premise rendering mandates (government, healthcare, finance), and budget-constrained projects that have technical talent available. If you need complete control and have the expertise to maintain it, this approach delivers maximum flexibility at minimum recurring cost.
It should only be considered when video is the core, mission-critical component of your product itself, and no API can meet your unique technical or security requirements. Unless you have a dedicated engineering team ready to manage a complex media server, this path introduces far more risk and cost than it saves.
👉 Getting started with FFmpeg? Our How to use FFmpeg guide might be a useful read.
Method 4: How to automate shortform videos with an API?
API-first platforms such as Shotstack turn video editing and generation into a web service. You design a video template once, then send data through it to generate unlimited variations. The template lets you edit the structure, including background video, text positions, timing, and effects. Your data fills in the variables: product names, prices, headlines, and images.
Think of it like a mail merge for video. You create the layout. The API handles the rendering.
The Workflow:
To get started, sign up for a free Shotstack account. Unlimited sandbox and trial credits. No card required. Next:
- Design your template with placeholders for dynamic content or choose one from our library.
- Test the template with sample data.
- Connect to your data sources.
- Automate the API calls.
- Handle asynchronous rendering.
- Scale across multiple platforms.
Step 1: Design your video template
Start by creating the video structure. Shotstack provides a browser-based studio where you drag elements into place, set timing, add effects, and preview in real-time, similar to other online template-based video automation tools.
Your template can include both fixed and dynamic elements. Fixed elements stay the same across every video — your logo, background music, brand colors, transitions. Dynamic elements change based on data, including product images, text overlays, pricing, and headlines. JSON to video in a matter of minutes.
For this tutorial, we’ll use this professional product video template that creates a 5-second vertical video perfect for social media advertising.
👉 You can check out this and many other pre-made templates in our template library.
The {{PRODUCT_NAME}}, {{PRODUCT_FEATURE}}, and {{PRODUCT_IMAGE}} are placeholders. Every time you generate a video, you replace these with actual product data. The merge array at the end defines which data will dynamically replace these placeholders.
Step 2: Test your template
Before automating anything, validate that your template works. Save your template as a JSON file, but override the replace fields in the merge array with your specific product data. Let’s test out a render of this template, but with {{PRODUCT_NAME}} changed to Voyager, the {{PRODUCT_FEATURE}} being its automatic movement, and {{PRODUCT_IMAGE}} a stock image.
Here’s the template we’ll save as voyager.json:
{
    "timeline": {
      "background": "#404548",
      "tracks": [
        {
          "clips": [
            {
              "asset": {
                "type": "text",
                "text": "BUY NOW",
                "alignment": {
                  "horizontal": "center",
                  "vertical": "center"
                },
                "font": {
                  "color": "#000000",
                  "family": "Montserrat ExtraBold",
                  "size": "66",
                  "lineHeight": 1
                },
                "width": 535,
                "height": 163,
                "background": {
                  "color": "#ffffff",
                  "borderRadius": 73
                },
                "stroke": {
                  "color": "#ffffff",
                  "width": 0
                }
              },
              "start": 1.955,
              "length": "auto",
              "offset": {
                "x": 0,
                "y": 0.066
              },
              "position": "center",
              "fit": "none",
              "scale": 1,
              "transition": {
                "in": "slideUp"
              }
            }
          ]
        },
        {
          "clips": [
            {
              "length": 3.97,
              "asset": {
                "type": "image",
                "src": "{{ PRODUCT_IMAGE }}"
              },
              "start": 1.03,
              "offset": {
                "x": -0.014,
                "y": -0.188
              },
              "scale": 0.367,
              "position": "center",
              "transition": {
                "in": "slideUp"
              }
            }
          ]
        },
        {
          "clips": [
            {
              "length": 5,
              "asset": {
                "type": "image",
                "src": "https://templates.shotstack.io/grey-minimalist-product-ad/4ee059ca-2fcd-4bfe-9de9-d940238c49d4/source.png"
              },
              "start": 0,
              "offset": {
                "x": 0,
                "y": -0.344
              },
              "scale": 0.535,
              "position": "center"
            }
          ]
        },
        {
          "clips": [
            {
              "asset": {
                "type": "text",
                "text": "{{ PRODUCT_NAME }}",
                "alignment": {
                  "horizontal": "center",
                  "vertical": "center"
                },
                "font": {
                  "color": "#ffffff",
                  "family": "Montserrat ExtraBold",
                  "size": "150",
                  "lineHeight": 1
                },
                "width": 800,
                "height": 422,
                "stroke": {
                  "color": "#0055ff",
                  "width": 0
                }
              },
              "start": 0,
              "length": 5,
              "offset": {
                "x": 0,
                "y": 0.338
              },
              "position": "center",
              "fit": "none",
              "scale": 1,
              "transition": {
                "in": "slideUpFast"
              }
            }
          ]
        },
        {
          "clips": [
            {
              "fit": "none",
              "scale": 1,
              "asset": {
                "type": "text",
                "text": "{{ PRODUCT_FEATURE }}",
                "alignment": {
                  "horizontal": "center",
                  "vertical": "center"
                },
                "font": {
                  "color": "#ffffff",
                  "family": "Montserrat ExtraBold",
                  "size": 46,
                  "lineHeight": 1
                },
                "width": 728,
                "height": 72
              },
              "start": 0.25,
              "length": 4.75,
              "offset": {
                "x": 0,
                "y": 0.207
              },
              "position": "center",
              "transition": {
                "in": "slideUpFast"
              }
            }
          ]
        },
        {
          "clips": [
            {
              "length": 5,
              "asset": {
                "type": "image",
                "src": "https://templates.shotstack.io/grey-minimalist-product-ad/cfd0e601-9e06-47b7-9d3d-c79e2ae51711/source.png"
              },
              "start": 0,
              "offset": {
                "x": 0,
                "y": -0.471
              },
              "scale": 0.741,
              "position": "center"
            }
          ]
        }
      ]
    },
    "output": {
      "format": "mp4",
      "fps": 25,
      "size": {
        "width": 1080,
        "height": 1920
      }
    },
    "merge": [
      {
        "find": "PRODUCT_NAME",
        "replace": "Voyager"
      },
      {
        "find": "PRODUCT_FEATURE",
        "replace": "Automatic Movement"
      },
      {
        "find": "PRODUCT_IMAGE",
        "replace": "https://images.pexels.com/photos/190819/pexels-photo-190819.jpeg?_gl=1*nawr9c*_ga*MTE3MTAwMzk1NC4xNzU5OTcxNTA2*_ga_8JE65Q40S6*czE3NTk5NzE1MDUkbzEkZzEkdDE3NTk5NzE1MjYkajM5JGwwJGgw"
      }
    ]
  }
Now it’s time to send your video definition to the Shotstack API to be rendered into a video file. Open your terminal, make sure you are in the same directory as your JSON file, and run the following curl command:
curl -X POST \
  -H "Content-Type: application/json" \
  -H "x-api-key: YOUR_API_KEY" \
  -d @voyager.json \
  https://api.shotstack.io/stage/render
You’ll get back a render ID immediately. The actual rendering happens asynchronously in the cloud — typically taking 30 seconds to 2 minutes, depending on complexity. You should see something like this:
{
"success":true,
"message":"Created",
"response":{
"message":"Render Successfully Queued",
"id":"RENDER_ID"
}
}
To check render status, use:
curl https://api.shotstack.io/stage/render/RENDER_ID \
  -H "x-api-key: YOUR_STAGING_KEY"
When the status returns “done,” you get a CDN URL to your finished video. Download and watch it. Does the text position correctly? Is the timing right? Iterate on the template until it’s perfect. This testing phase is critical.
Step 3: Connect to your data source
Now comes the automation. You can pull data from virtually any source:
- Google Sheets or CSV files
- Databases (MySQL, PostgreSQL, MongoDB)
- E-commerce platforms (Shopify, WooCommerce, BigCommerce)
- CMS systems (WordPress, Contentful, Strapi)
- APIs and webhooks from any SaaS tool
The automation process is straightforward with n8n or a simple script:
- Set up your data connection - Connect n8n to your data source using built-in integrations or API credentials
- Map your data fields - Match your source fields (product name, price, image URL) to template variables
- Create the automation loop - For each item in your data source, send an API request with that item’s data inserted into your template with your template ID.
- Handle the response - Store the returned video URL back in your database or trigger the next action in your workflow
With n8n’s visual interface, this entire process can be set up without writing code. For developers preferring scripts, a simple Python or Node.js loop would also do the trick.
👉 Do a deep dive into video editing automation (including writing Python automation scripts and saving templates) with our complete guide.
Step 4: Scale across all platforms
The power of a video editing API becomes obvious when you need the same video in multiple formats. Social platforms have different requirements—TikTok wants vertical (9:16), Instagram feed wants square (1:1), YouTube wants horizontal (16:9).
Instead of designing three separate templates, design once and render three times with different output resolutions:
// TikTok version
"output": {"format": "mp4", "resolution": "1080x1920"}

// Instagram version
"output": {"format": "mp4", "resolution": "1080x1080"}

// YouTube version
"output": {"format": "mp4", "resolution": "1920x1080"}
Same template, same data, three platform-optimized videos. Submit all three requests simultaneously; the API processes them in parallel. Within minutes, you have videos ready for every platform.
Step 5: Deploy and monitor
Once your automation works in testing, deploy to production. This means:
- Switch to production API keys and endpoints. Staging is for testing. Production handles your real video generation with higher rate limits and SLAs.
- Implement error handling. Network issues happen. API calls fail. Build retry logic with exponential backoff. Log failures for investigation. Set up alerts when error rates spike.
- Monitor your rendering queue. Most platforms provide dashboards showing render volume, success rates, average render times, and quota usage. Watch for anomalies. Sudden spikes in failures might indicate problems with your template or data.
- Cache aggressively. If you’re generating the same video multiple times (same product, same data), store the result. Check your database for existing videos before sending new render requests. This saves both time and API costs.
Pros of a video API
- Scalability is effectively unlimited. The rendering infrastructure handles parallel processing across distributed servers. Submit 10 requests or 10,000 requests—the per-video processing time remains constant. No queue bottlenecks. No “scaling issues” when your campaign suddenly needs 5,000 videos.
- Integration is native. Your video generation logic lives alongside your application code, connected to the same databases and APIs that power your business. Product catalog updates automatically trigger video updates. User signups immediately generate personalized videos. Real-time data flows directly into video content.
- Creative freedom is absolute. No template marketplace constraints. No “coming soon” features you’re waiting on. If you can define it in JSON, you can render it. Complex animations, conditional logic, dynamic duration adjustments—all possible.
- Version control becomes reality. Templates are code. Store them in Git. Review changes through pull requests. Deploy updates through CI/CD pipelines. Roll back bad template changes instantly. When you need to update brand colors across 50 video templates, it’s a find-and-replace operation, not 50 manual edits.
- Multi-format output from single templates means platform-specific optimization happens automatically. Design your video once. Render it as vertical for TikTok, square for Instagram, and horizontal for YouTube, all from the same template structure. Update the template once, regenerate all formats.
Cons:
- Cost structure requires volume to justify. API platforms charge per render minute, but even at low volumes (under 100 videos monthly), this can still be less than template platforms. The economic advantages shine at scale (hundreds or thousands of videos), where per-video costs drop dramatically and time savings compound.
- A technical barrier exists. You need development resources, someone comfortable making HTTP requests, handling JSON, implementing webhooks, or polling logic. Worth mentioning, however, are AI code generation tools that lower that barrier to entry. With AI capabilities, it often is as simple as copying and pasting code.
Best use cases
API-first architecture makes sense for specific scenarios. You can use the process shown in this guide for any high-volume production (500+ videos monthly) where manual processes become untenable. SaaS products where video generation is a complementary feature that users access. E-commerce at scale, where every SKU deserves a video, but manual creation is economically impossible. Real estate platforms are generating property videos on listing creation. Marketing agencies serving dozens of clients, each requiring customized video campaigns. It makes sense for any business where video is an output of structured data rather than a manually crafted asset.
How to automate shortform videos with AI?
Automating short-form videos with AI is a two-stage process. First, generative AI tools create the raw content assets, such as images, scripts, voiceovers, or even short clips. Second, a video automation API like Shotstack programmatically assembles these AI-generated assets into a final, polished video based on a set template.
In this model, Shotstack functions as the assembly line, while the various AI tools act as the parts factory. For the Shotstack API, an AI-generated asset is treated just like any other piece of data:
- An image from DALL-E or Midjourney is an image URL.
- A script from ChatGPT is a text string.
- A voiceover from ElevenLabs is an audio file URL.
- A clip from Sora is a video URL.
These assets can be fed directly into Shotstack video templates through an API call. The workflow becomes a distinct three-stage process:
- AI Content Generation: An AI service is called to create the required content. Shotstack API also integrates with several generative AI tools within the platform.
- Programmatic Video Assembly: The Shotstack API ingests these assets and renders the video.
- Automated Delivery: The final video is delivered or published by the automation pipeline.
This combination of AI content generation and programmatic video assembly enables the production of thousands of unique videos with minimal manual intervention. AI manages the creative task, while Shotstack handles the technical production, resulting in a fully automated pipeline from concept to delivery. For a complete worked example of this three-stage pipeline — AI script and voiceover, Shotstack render, and publishing through the Instagram Graph API — see our guide to automating Instagram posts with AI video.
Getting started with programmatic video editing at scale
Shotstack offers a free tier and trial credits. Our documentation includes easy-to-follow examples that have you rendering your first video in minutes. Visual template builder and online studio editor let you design without touching JSON initially and export the result once you’re happy with it.
Start small. Pick one use case. Design one template. Generate 10 test videos. If they look right, connect to your real data and scale. Most teams launch their first automated video workflow within a week of starting. Three hours of template design and automation setup replace hundreds of hours of manual editing. 84% of marketers believe that switching to video directly led to increased sales. That ROI compounds every month as your content needs grow.
Discover why thousands of businesses use Shotstack’s powerful video editing and generation API to automate their shortform video content. Get started for free or talk to a team member for a demo.
Frequently asked questions (FAQs)
How do I handle dynamic text of varying lengths in a template?
You handle varying text lengths using built-in features like automated text fitting and scaling, or by programmatically formatting the text before sending it to the API. Professional video APIs like Shotstack often include functions that automatically adjust font size to fit a designated area. The alternative approach is to have your own code truncate or reformat the text to a set character limit before the API call is made.
How can I ensure all my automated videos maintain brand consistency?
You ensure brand consistency by encoding all brand guidelines—such as logos, specific fonts, and colors—into a master video template. This template then acts as a strict blueprint for every video that is generated. By using a template, you eliminate the risk of human error and guarantee that all content, regardless of the data source, perfectly adheres to your brand identity.
What happens if an API call fails or a video render has an error?
If an API call fails, your system should be designed to handle the error, typically by retrying the request or logging it for manual review. For production-grade automation, your code should include logic to manage these scenarios. This often involves retrying the call for temporary network issues and logging the details of failed render IDs for later investigation. Most platforms also provide specific error messages to help diagnose the problem, like a broken media URL.
Can I automate the audio and music in my videos?
Yes, the entire audio landscape of a video can be automated. A video API like Shotstack allows you to programmatically set a soundtrack, add one or more voiceover tracks, and adjust the volume levels of each audio asset. You can use a library of stock music or provide URLs to your own audio files, making the soundscape just as dynamic as the visuals.
Get started with Shotstack's video editing API in two steps:
- Sign up for free to get your API key.
- Send an API request to create your video:
curl --request POST 'https://api.shotstack.io/v1/render' \
--header 'x-api-key: YOUR_API_KEY' \
--data-raw '{
  "timeline": {
    "tracks": [
      {
        "clips": [
          {
            "asset": {
              "type": "video",
              "src": "https://shotstack-assets.s3.amazonaws.com/footage/beach-overhead.mp4"
            },
            "start": 0,
            "length": "auto"
          }
        ]
      }
    ]
  },
  "output": {
    "format": "mp4",
    "size": {
      "width": 1280,
      "height": 720
    }
  }
}'


Experience Shotstack for yourself.
- Seamless integration
- Dependable high-volume scaling
- Blazing fast rendering
- Save thousands