In this article we'll show you how to use Integromat and Shotstack to build an automated workflow that takes your source footage from Google Drive, adds a watermark and uploads it back to Google Drive.
Before we get started sign up to Integromat and find the Shotstack app.
How will this work
Integromat refer to themselves as 'the glue of the internet', and their platform allows you to automate manual processes, without needing code. This is done by creating scenarios that link together different data sources and APIs. In this example we will link together Google Drive and Shotstack, and will consist out of two scenarios.
The first scenario will take all files in a Google Drive folder of your choosing and apply a uniform watermark using Shotstack.
The second scenario will listen for when your videos have finishing rendering. We then download these watermarked videos and upload them to another folder on Google Drive.
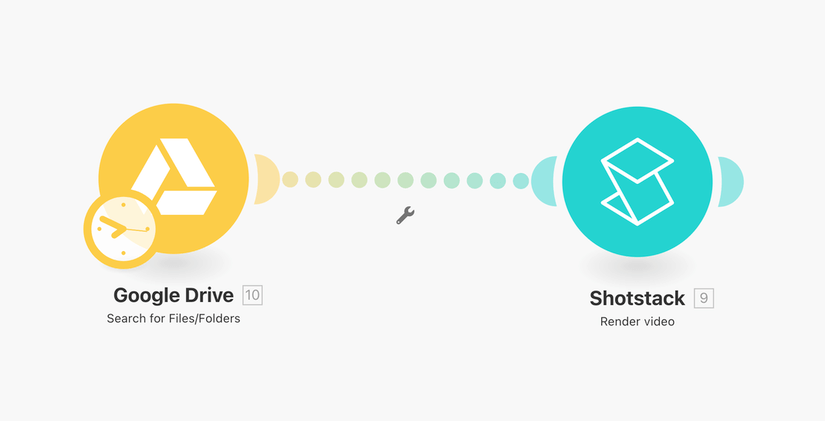
Scenario 1: Watermark all videos in a Google Drive folder
Making your source footage publicly available
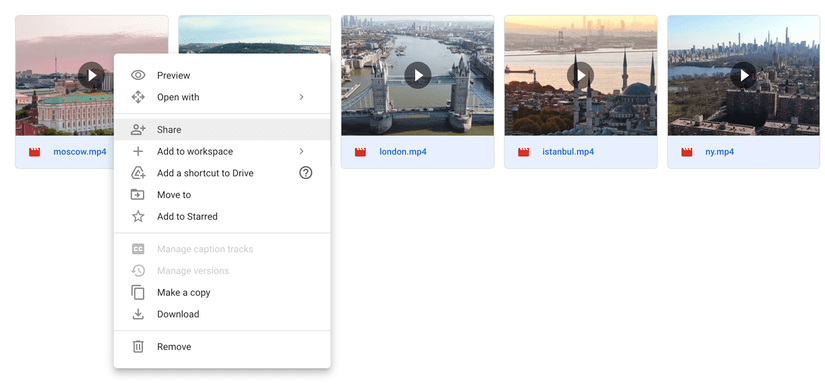
For this example we will use a set of eight 10 second drone footage clips.
You can use these example files or use your own set of videos, but please make sure to make all the files inside your Google Drive folder publicly accessible for Shotstack to be able to download the videos. You can do this by right clicking on all of your files and clicking Share.
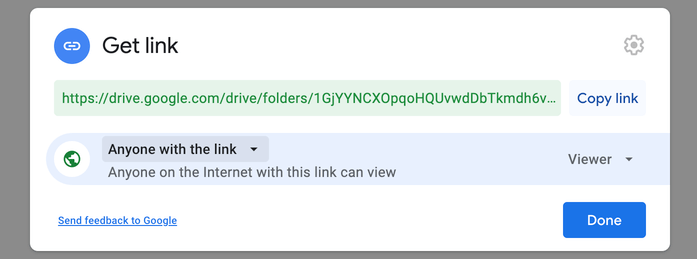
Make sure that all your files have the option checked saying that anyone on the internet with this link can view.
Add the Google Drive module
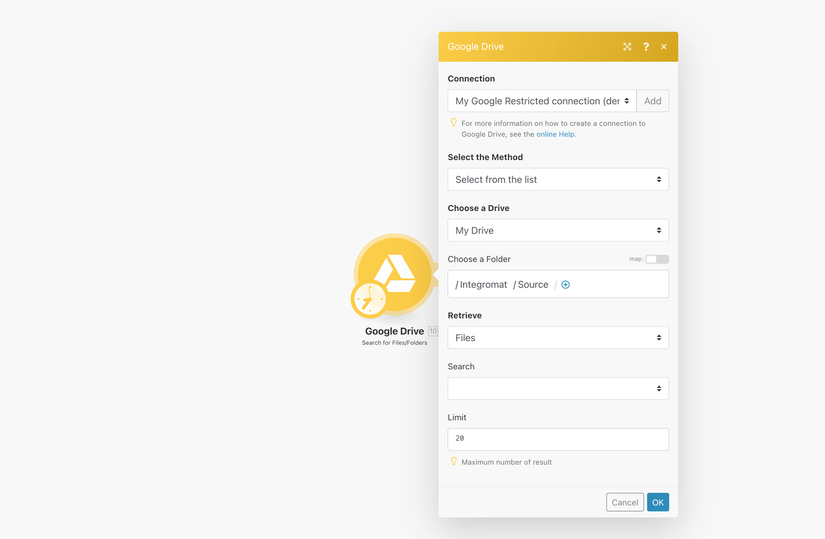
Now, for our first scenario we need the Google Drive module called Search for Files/Folders and add this module to your scenario by selecting it in your available apps. You'll need to connect your Google Drive account, and then select the folder in which you have stored your source videos.
Add the Shotstack module
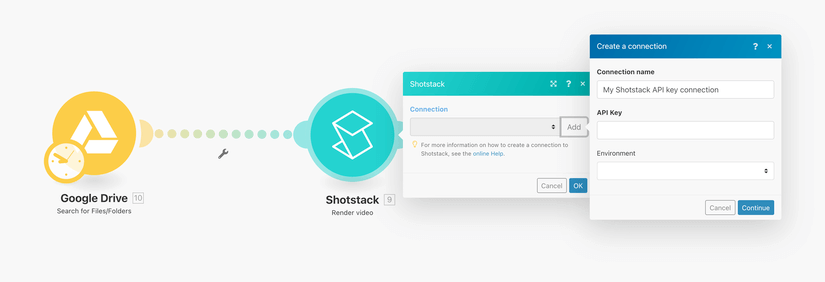
Secondly you need the Shotstack Render module and connect it to your Google Drive module. You will also need to add your Shotstack API key. You can get this by registering for a Shotstack account and logging into your dashboard. You can find your keys by clicking on API Keys in the top right corner of the dashboard. Make sure to use your stage key for testing purposes as this key isn't charged. Once you are happy with your workflow you can switch over to your production key.
Once you've connected your API key to Integromat you can configure the Render module. A Shotstack render works in a similar manner as how you would use a desktop video editing application. You add tracks and clips to your timeline, and choose how these transition from one clip to the next.
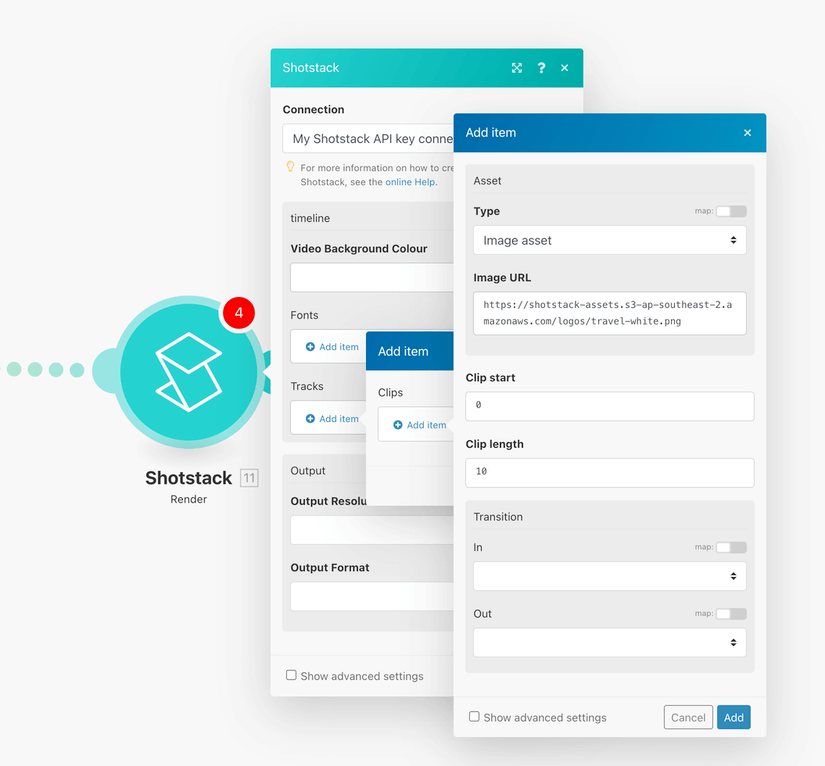
As we only want to add a watermark we only need two clips. One clip with our source video footage, and another clip that overlays the image watermark.
Clip containing watermark
We want the top clip of our Edit to contain the image watermark, as we want to overlay this image over the video. We will use a static watermark and make the clip start at 0 seconds for 10 seconds in clip length, which is the same length as all of the source videos.
To make the watermarked video look good we need to work a bit on image placement. Click on the show advanced settings button near the save button and configure the scale, position and offset property.
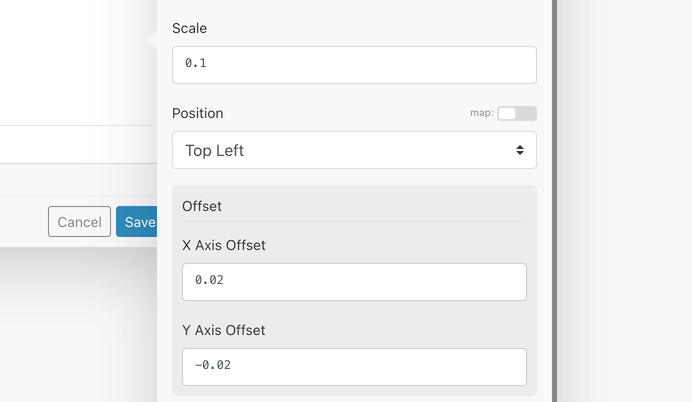
These properties scale the image to fit the video viewport and position it slightly off the upper left corner of the viewport.
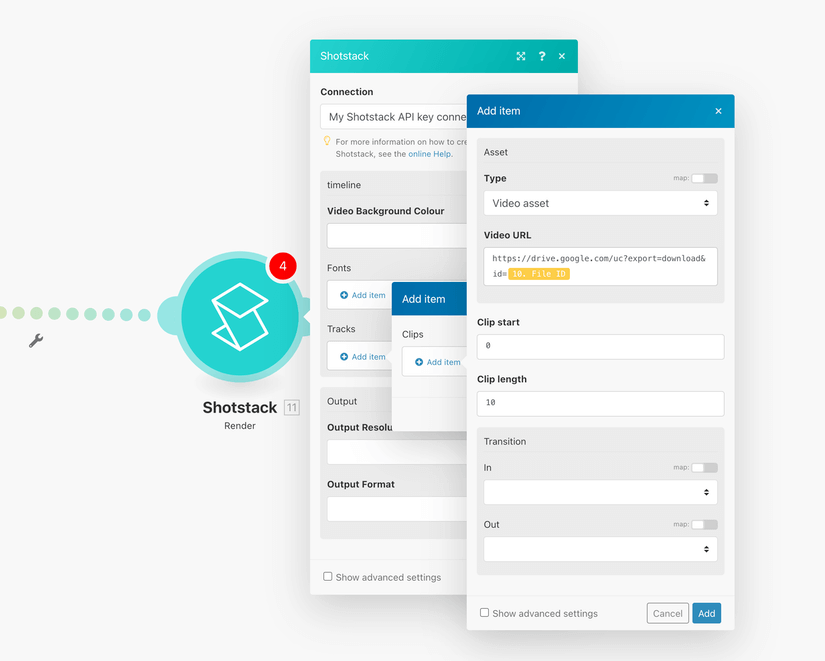
Clip containing source video footage
Add another track with one clip containing a video asset. The video asset should include the url to the source video file. To allow Shotstack to download your videos from Google Drive you can use the following link:
https://drive.google.com/uc?export=download&id=GOOGLE_DRIVE_FILE_ID
We know that every clip is 10 seconds in length, and we will not use a transition.
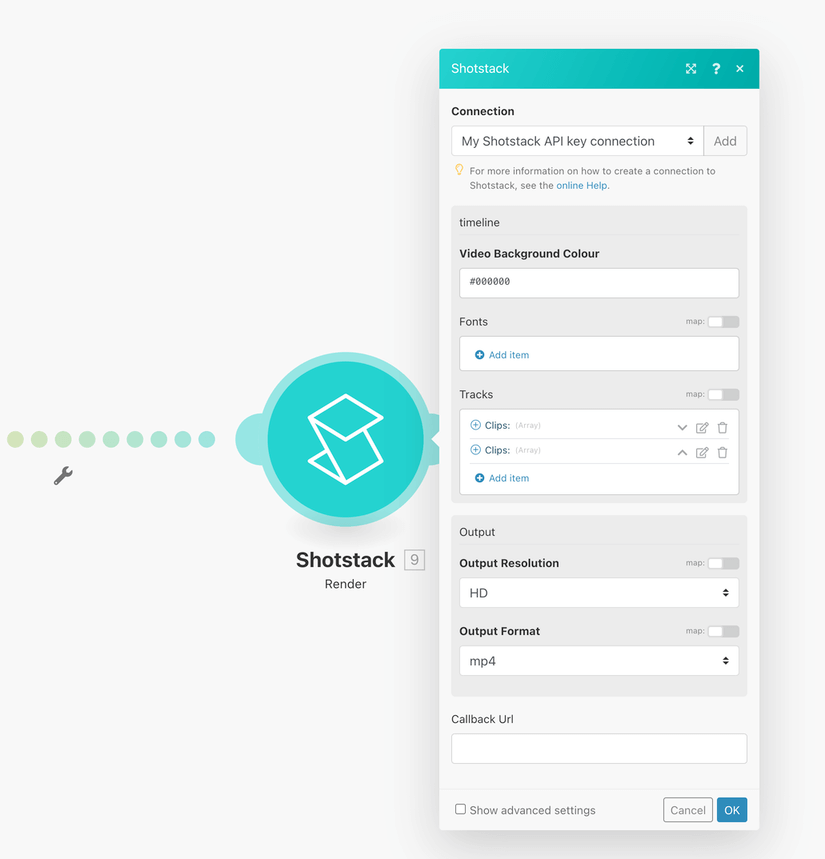
Timeline and output configuration
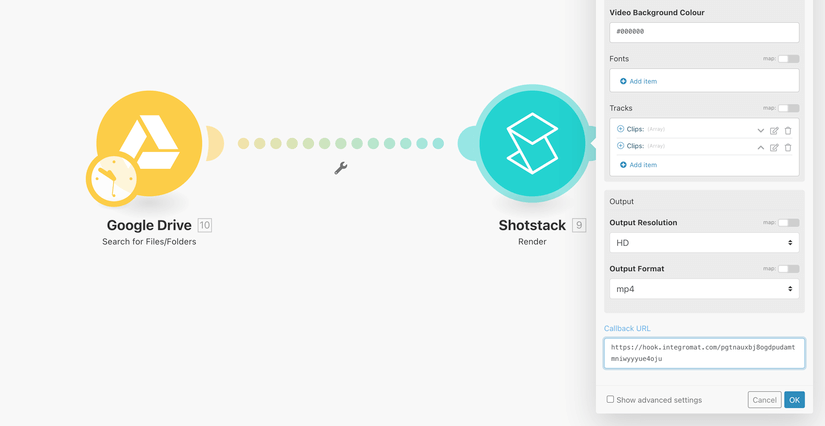
Lastly we set the output resolution to HD and choose mp4 as output format. We keep the callback URL empty for now, but we'll get back to this once we've set up our second scenario.
Running the scenario
Everything is now set for you to take all of your videos and apply a watermark to them. Click Run once in the bottom left corner of your screen and sit back and enjoy while your watermarked videos are being processed.
But where did our watermarked videos go? Are they done? How do we know? For that we need our second scenario.
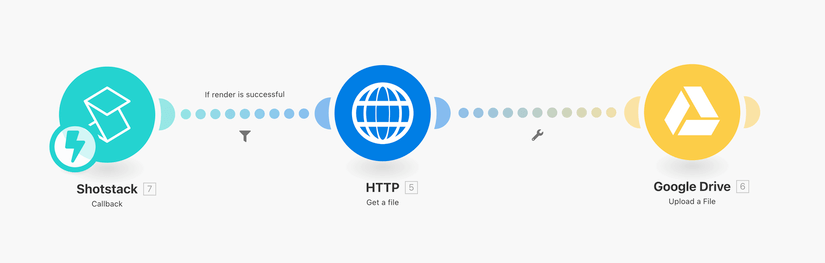
Scenario 2: Listen for completed renders and upload to Google Drive
Now that we've built the scenario that allows us to render our watermarked videos we need to build a scenario where we listen for videos that have finished rendering. The way we do this is by using the Shotstack Listener. This module provides you with a callback url which you can pass to your video renders.
Once videos are done rendering Shotstack sends a message to the listener with the details surrounding your video. This includes the URL where your video is stored for 24 hours. We then download the video to Integromat and proceed to upload it to a new folder on Google Drive.
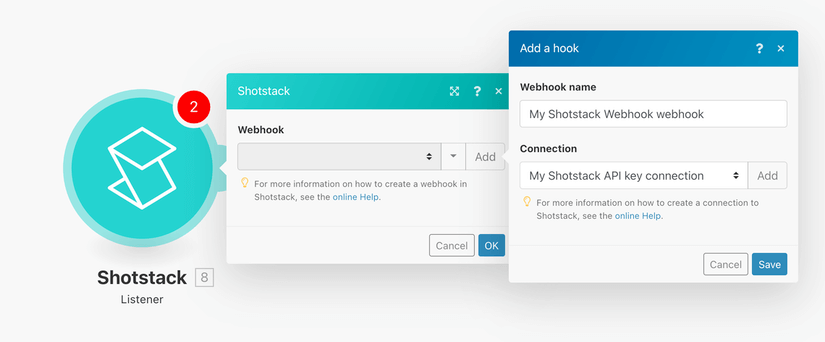
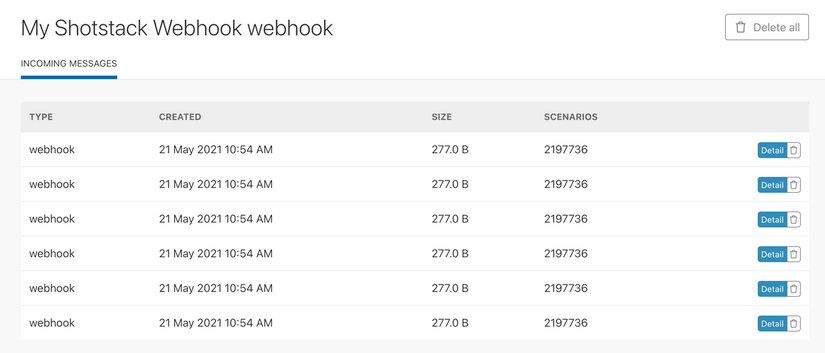
Configuring the Shotstack Listener
We first need to configure the Listener by adding a webhook. Add the Shotstack Listener to your scenario and add a hook using your existing Shotstack connection.
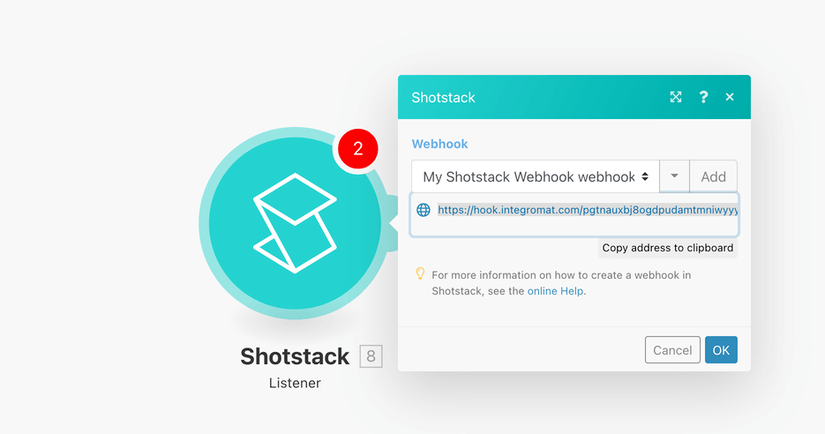
Now copy your webhook address to your clipboard or save it somewhere. We'll need this a little bit later.
Downloading your watermarked video
Now that we have our Listener set up we will use the Get a file HTTP module to download the file to Integromat by passing along the URL of the rendered video.
Please be aware that the free version of Integromat only allows downloads with a maximum file size of 5MB. If you are using the free version I would recommend using the preview output resolution to reduce your video file size as much as possible.
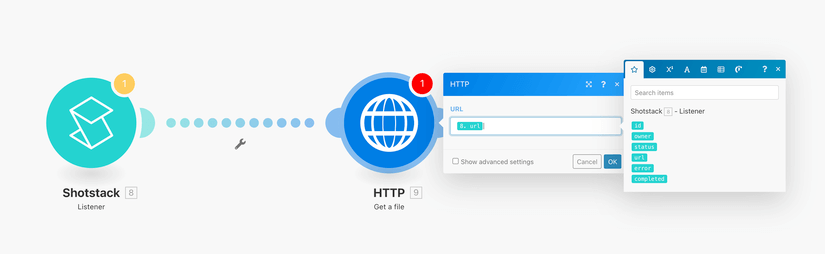
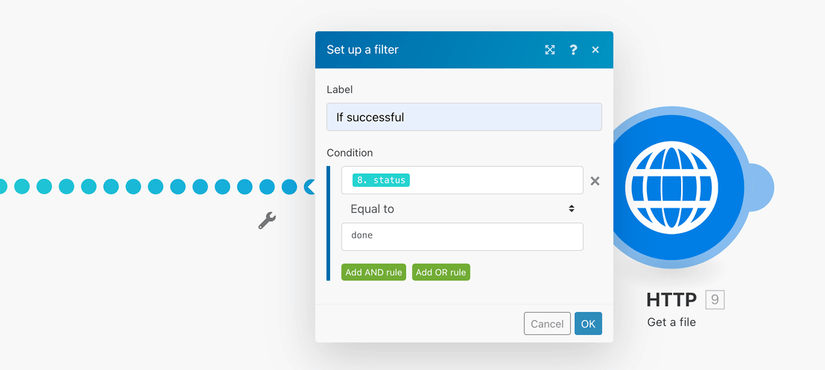
We will also add in a filter to only download the file if the render was successful by only allowing data to pass where the returned status property equals done. You can do this by clicking on the line connecting the Shotstack Listener to the HTTP module.
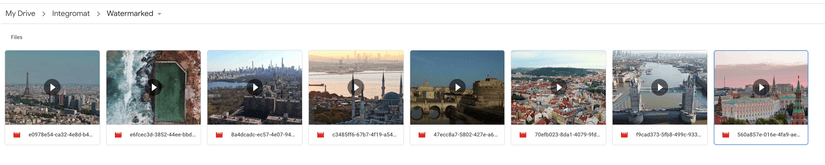
Upload your watermarked videos to Google Drive
We now add the Google Drive Upload a File module and configure it to upload the data downloaded using the HTTP module. For File Name I've used Shotstack id property and appended the mp4 extension. For data choose the HTTP module's Data property.

Now make sure to turn on your Listener in the top right corner of your screen.
Add your webhook URL to your first scenario
Now we need to link the two scenarios together. We do this by taking the webhook URL we previously copied across to our clipboard. Go back to your first scenario and paste the URL into the Callback URL property of your Shotstack Render module.
Your automated video watermarking workflow
You have now built a fully automated watermarking workflow using Integromat through Google Drive and Shotstack. When you run your first scenario all your watermarked videos will be intercepted by the Shotstack Listener who adds it to its queue.
Integromat will start processing your queue and upload your watermarked videos to Google Drive. Please be aware of Integromat's rate limits, as the free plan only allows 10 videos to be queued at any one time.
Congratulations. Your automated watermarking workflow is complete. For more advanced guides on how to get the most out Shotstack take a look at our learn section.
Get started with Shotstack's video editing API in two steps:
- Sign up for free to get your API key.
- Send an API request to create your video:
curl --request POST 'https://api.shotstack.io/v1/render' \
--header 'x-api-key: YOUR_API_KEY' \
--data-raw '{
  "timeline": {
    "tracks": [
      {
        "clips": [
          {
            "asset": {
              "type": "video",
              "src": "https://shotstack-assets.s3.amazonaws.com/footage/beach-overhead.mp4"
            },
            "start": 0,
            "length": "auto"
          }
        ]
      }
    ]
  },
  "output": {
    "format": "mp4",
    "size": {
      "width": 1280,
      "height": 720
    }
  }
}'


Experience Shotstack for yourself.
- Seamless integration
- Dependable high-volume scaling
- Blazing fast rendering
- Save thousands


