Node.js SDK
Node.js Video Editor
A Node.js video editor for building video centric applications and workflows. The Shotstack API is a cloud video editor accessed via a Node.js SDK.
Start for Free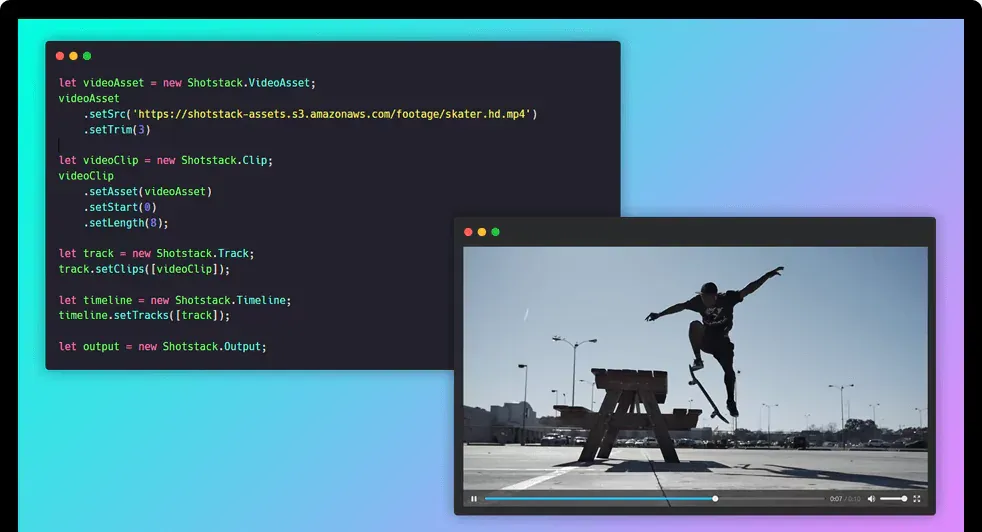
A Node.js video editor for building video centric applications and workflows. The Shotstack API is a cloud video editor accessed via a Node.js SDK.
Start for FreeOver 20,000 Businesses & Developers from 119 Countries Trust Shotstack
The Shotstack Node.js video SDK makes it quick and easy to set up a Node based video editor that can be integrated in to your applications in days, not months.
The video editing package is open-source, available as an NPM module or directly from GitHub. The SDK works directly with the Shotstack video editing API which is a fully managed, cloud hosted service that removes the need to compile and install software, manage Lambdas, containers or servers.
Shotstack ships with all the essential video editing features you need, including cut and trim, stitching clips, transitions, filters and effects and lets you merge videos, images, text and audio. All accessible using familiar JavaScript, JSON and Node.js.
Require the library in to your script.
const Shotstack = require('shotstack-sdk');Set the base path of the API client to point to either the stage sandbox or v1 production environment.
const defaultClient = Shotstack.ApiClient.instance;
defaultClient.basePath = 'https://api.shotstack.io/stage';Set the API key using your own key which you will receive when you register. You should load the key using environment variables in a production environment.
const DeveloperKey = defaultClient.authentications['DeveloperKey'];
DeveloperKey.apiKey = 'H7jKyj90kd09lbLOF7J900jNbSWS67X87xs9j0cD';The API supports a full range of video editing features but to keep things simple, this example shows how to trim a video clips start and end point. Set the video asset trim to 3 to cut the first 3 seconds off the start and then play the next 8 seconds by setting the length to 8. Setting the start to 0 means the video clip start straight away.
let videoAsset = new Shotstack.VideoAsset;
videoAsset
    .setSrc('https://s3-ap-southeast-2.amazonaws.com/shotstack-assets/footage/skater.hd.mp4')
    .setTrim(3);

let videoClip = new Shotstack.Clip;
videoClip
    .setAsset(videoAsset)
    .setStart(0)
.setLength(8);A track is like a layer that can contain clips layered on top of each other, for examples; text over a video. This video just has one clip which is added to a single track.
let track = new Shotstack.Track;
track.setClips([videoClip]);The timeline specifies all the tracks, as an array, that make up the final video edit.
let timeline = new Shotstack.Timeline;
timeline.setTracks([track]);Every video needs an output specification, here the format is set to mp4 and the resolution to SD.
let output = new Shotstack.Output;
output
    .setFormat('mp4')
.setResolution('sd');The final edit is made up of the timeline and the output format.
let edit = new Shotstack.Edit;
edit
    .setTimeline(timeline)
.setOutput(output);The SDK takes care of converting the edit to JSON and posts it to the API for rendering returning a Promise.
const api = new Shotstack.EditApi();
api.postRender(edit).then((render) => {
    console.log(render.response);
});Finally, check the status of the render and when done output the video URL. Modify the request from step 9 and add the status check inside the render response.
const api = new Shotstack.EditApi();
api.postRender(edit).then((render) => {
    api.getRender(render.response.id).then((data) => {
        if (data.response.status === 'done') {
            console.log(data.response.url);
        }
    });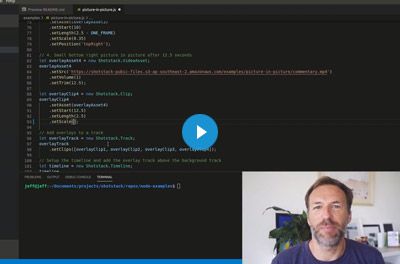
});The Node.js code above prepares a JSON payload, describing the video editing parameters to trim a video clip, POST's it to the Shotstack API and generate this video.
This application is the perfect example of a well executed and documented API. In less than 10 mins, set up, web hook done, and first render!
There are a couple of other options out there that attempt to provide the same or similar solution, but none of them come close in terms of quality, ease of use, and speed.
Shotstack was EXACTLY what I was looking for, and incredibly easy to get started with. You guys are killing it.
Unlimited developer sandbox
No credit card required