What is Integromat
Integromat is an automated workflow tool that connects different apps together. You can move data between different sources and create actions based on the different services available in Integromat.
Before we get started please register for a Shotstack account and find the Shotstack Integromat app. This provides you with access to all Shotstack modules you need to start automatically applying watermarks to your videos.
What is Shotstack
Shotstack is an API that allows you to generate images and video. Where you would otherwise use a video editing solution such as Premiere or iMovie you can use Shotstack to completely automate this process, while accessing all of the functionalities these video editing solutions have to offer.
How do Shotstack and Integromat work together
Shotstack natively integrates with Integromat and allows anyone to generate video without needing to know any code. Integromat provides for an easy drag-and-drop interface that takes your data from any source and imports it straight into Shotstack, allowing you to create thousands of personalised videos at the click of a button.
Generating a new personalised recipe video every day
In this guide we’ll show you how to create 31 simple but highly personalised “Dish of the Day” videos, one for every day of the month. We’ll do this by reading a row in a Google Sheet and writing those to 31 separate videos every single day over the course of a month.

Building an Integromat scenario
An Integromat scenario is a series of modules that indicate how data should be transferred and transformed between apps/services. In our example we’ll use two apps; Google Sheets and Shotstack.
If you don’t want to build these scenario’s yourself you can directly download the scenarios (render scenario, watch scenario) and import them directly into Integromat. You can also make a copy of the Google Sheet.
Setting up your connection
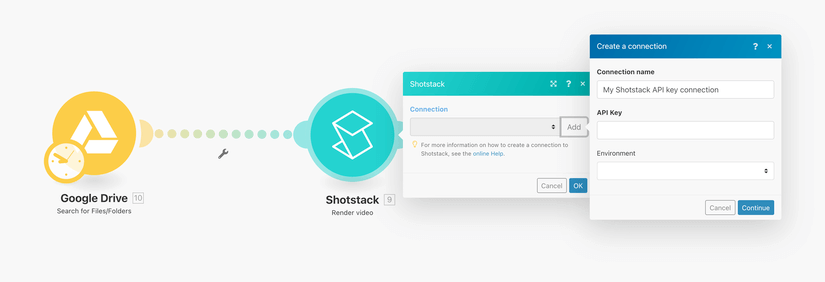
You will also need to add your Shotstack API key. You can get this by registering for a Shotstack account and logging into your dashboard. You can find your keys by clicking on API Keys in the top right corner of the dashboard. Make sure to use your stage key for testing purposes as this key isn’t charged. Once you are happy with your workflow you can switch over to your production key.
Render your video
Add the Google Sheets and Shotstack module and connect them as follows: 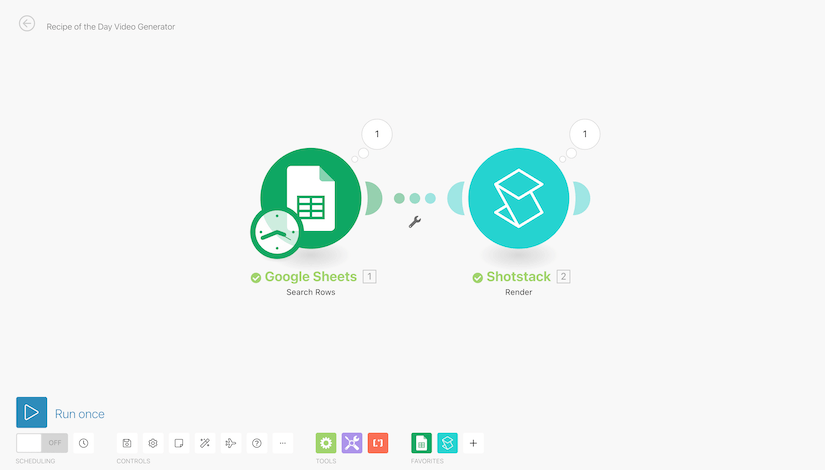
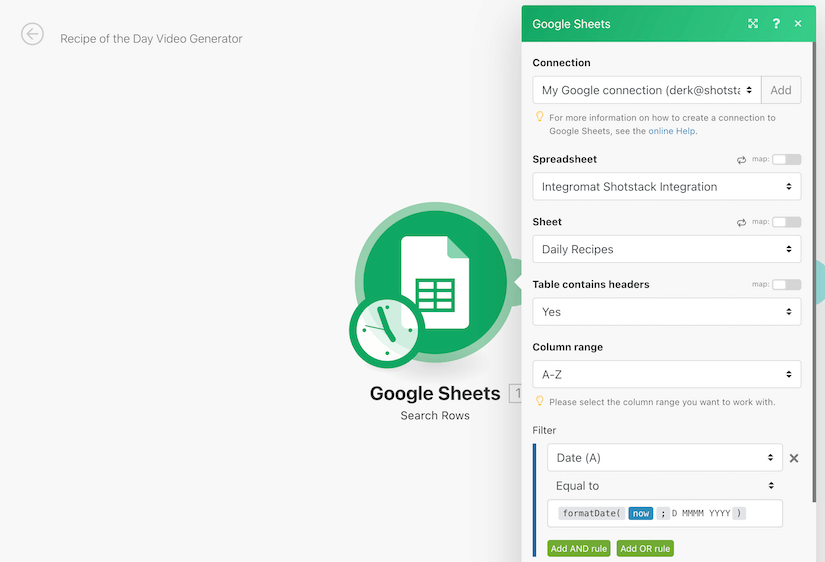
The Google Sheets module searches for the current day of the month and send through that data to the Shotstack module.
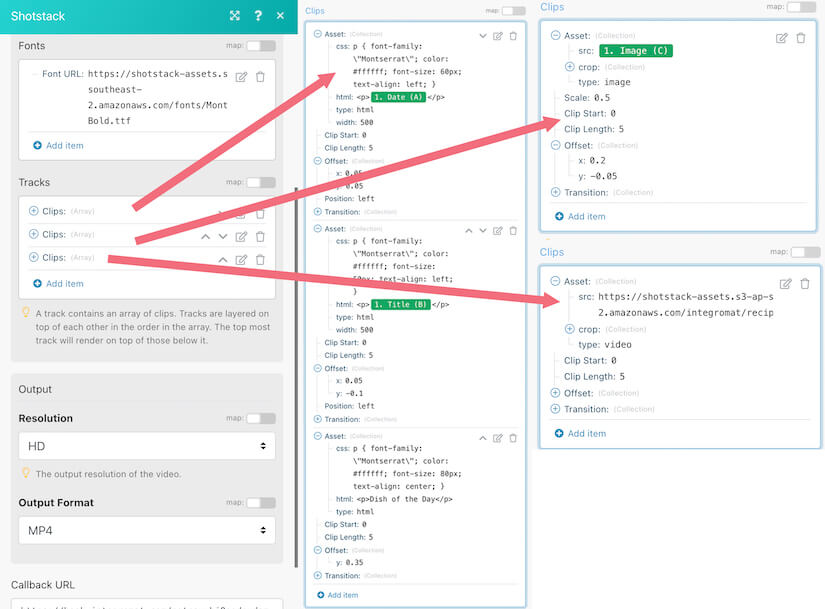
Shotstack renders your video in a similar manner to how you would use a desktop editing solution. In your timeline you add the different tracks and clips that make up your edit. In this particular example we use three tracks:
- Track one consists of three clips with HTML assets which take todays date, the recipe and add a title to the top of the video.
- Track two consists of one clip with an image asset that shows an image of the recipe of the day.
- Track three consists of one clip with a video asset that sits in the background and makes up our template.
In the overall configuration of the Shotstack module we choose our output format as MP4 and set our output resolution at HD. We will also fill in the callback URL with the webhook URL we get when setting up our next scenario.
You can learn more about how Shotstack works in this quick start guide.
Watch for your completed videos
Add the Shotstack Watch module and connect them together. The Watch module waits for a video to finish rendering, it then searches for the video in Google Sheets, and finally the video URL is added to the appropriate row: 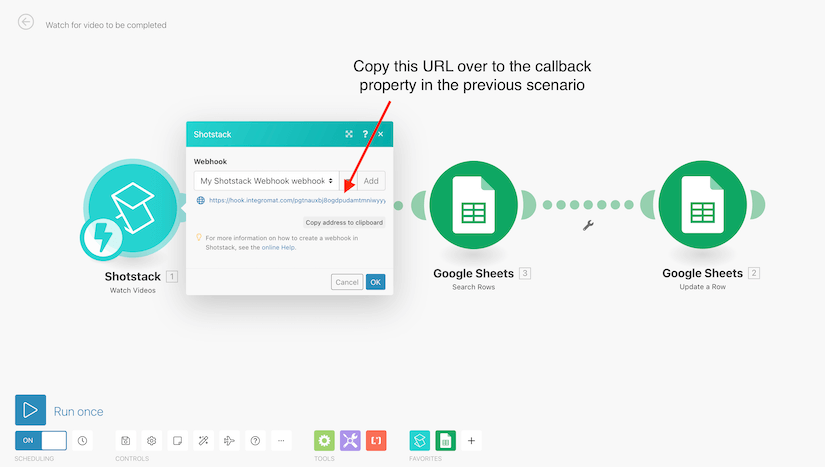
Run the scenario
Turn on the watch scenario to start listening for completed renders and run your render scenario to see your workflow in action.  Now schedule your render scenario to run daily and your workflow will create a new personalised video every single day.
Get started with Shotstack's video editing API in two steps:
- Sign up for free to get your API key.
- Send an API request to create your video:
curl --request POST 'https://api.shotstack.io/v1/render' \
--header 'x-api-key: YOUR_API_KEY' \
--data-raw '{
  "timeline": {
    "tracks": [
      {
        "clips": [
          {
            "asset": {
              "type": "video",
              "src": "https://shotstack-assets.s3.amazonaws.com/footage/beach-overhead.mp4"
            },
            "start": 0,
            "length": "auto"
          }
        ]
      }
    ]
  },
  "output": {
    "format": "mp4",
    "size": {
      "width": 1280,
      "height": 720
    }
  }
}'


Experience Shotstack for yourself.
- Seamless integration
- Dependable high-volume scaling
- Blazing fast rendering
- Save thousands