For certain outcomes you may not find the built-in effects and transitions sufficient, and require a way to create dynamically sized elements with custom animations. Examples may be animated lower thirds, intros/outros or animated panels.
In this tutorial we’ll show you how to create an animated lower third with custom dimensions based on its contents. This is done using a custom animation used as a luma asset in conjunction with an html asset.
Our final output will like like the video below:
Creating a custom luma animation in After Effects
We start by creating our luma matte animation in Adobe After Effects. This will be a very simple rectangular popup bounce effect that plays for one second. This will form the intro animation for our lower third.
For an introduction on luma assets we have a luma matte transitions guide that will provide you with an overview, but in short, it’s a black and white animation where the white of the animation acts as a mask for the underlying video.
Create a new composite with a square shape
Create a new project with a width and height of 1920px x 1080px, a duration of 1 second, a white background colour and frame rate of 25fps.
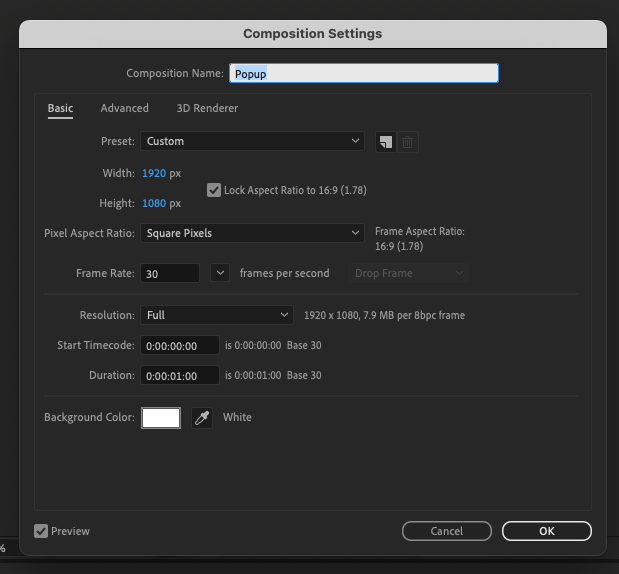
In your new composite make sure to turn off the transparency grid. On your composition use the rectangle tool to create a shape sized 1600px x 900px and center it to the composition.

We choose the size of the rectangle based on the maximum size the rectangle will take when we add keyframes for the scale property. As we’ll be scaling the rectangle to 120% we’ll need to make the rectangle 83.3% the size of the composition for the animation not to overflow the video container’s width.
Keyframing
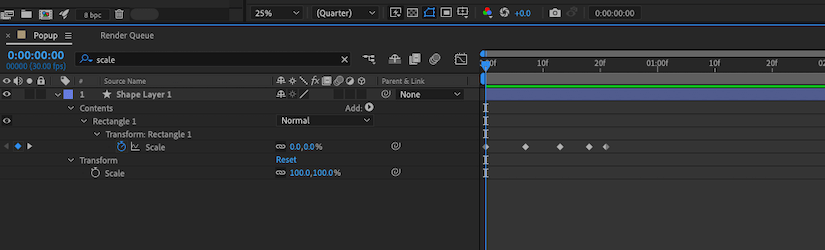
We now add 5 keyframes to our shape attached to the scale property:
- 0% Scale at frame 0
- 120% Scale at frame 5
- 90% Scale at frame 10
- 105% Scale at frame 15
- 100% Scale at frame 18
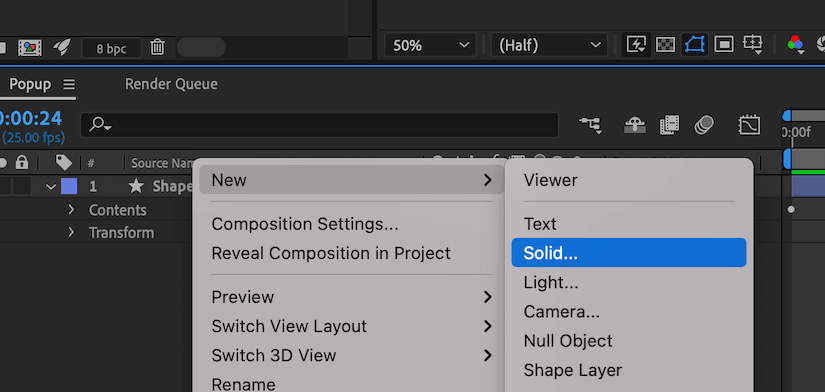
Add a white background
Add a new white solid to your composition for your background, and make sure to position it behind your rectangle.
Export your video
Now that your animation is complete export it as an MP4 video file, which can be exported using the Adobe Media Encoder.
Create an animated lower third
We can now go ahead and create our lower third animation. We do this by combining a luma asset with an html asset, allowing us to style our animation using CSS and include styled text. For this tutorial our lower third will introduce the presenter of a video clip using our newly created bouncing popup effect.
Luma asset
The luma asset only needs to reference our luma matte animation we just created using After Effects.
{
    "asset": {
        "type": "luma",
        "src": "https://shotstack-assets.s3.amazonaws.com/luma-mattes/effects/popup.mp4"
    },
    "start": 0,
    "length": 2
}
HTML asset
The HTML asset allows us to style the text and background. Use the width and height of the asset to set the dimensions of your lower third. Set a background color using the background property that will be revealed by the black part of the luma animation. We then use css to style the text inside of it. We’ll also add in a custom font.
{
    "asset": {
        "type": "html",
        "html": "<div><p><b>Scott Ko</b><br>ColourSpace Galleries</p></div>",
        "css": "p { font-family: \"Manrope Light\"; font-size: 20px; color: #ffffff; text-align: left; } b { font-family: \"Manrope ExtraBold\"; font-size: 26px; } div { margin: 60px; }",
        "width": 400,
        "height": 120,
        "background": "#141414"
    },
    "start": 0.5,
    "length": 5,
    "position": "bottomLeft",
    "offset": {
        "x": 0.05,
        "y": 0.1
    },
    "transition": {
        "out": "fade"
    }
}
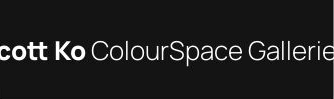
Note that the HTML container will shape itself based on the html container width and height, but is bound by the dimension of the of the luma animation used. In our case this means that the size of the HTML container (due to the scaling) is larger than the size of the rectangle after the animation completes. To adjust for this we add a margin of 60px to our CSS so that our text stays within the final rectangle shape.
 |  |
|---|---|
| without margin | with 60px margin |
Our final lower thirds video
Using your own luma matte effect with an HTML asset opens up an enormous amount of creative possibilities allowing you to create dynamically shaped effects that contour to the size of your dynamic data.
For the final video we apply the lower third over the top of a presenter talking to the camera using the following JSON:
{
    "timeline": {
        "fonts": [
            {
                "src": "https://templates.shotstack.io/basic/asset/font/manrope-extrabold.ttf"
            },
            {
                "src": "https://templates.shotstack.io/basic/asset/font/manrope-light.ttf"
            }
        ],
        "tracks": [
            {
                "clips": [
                	{
                        "asset": {
                            "type": "luma",
                            "src": "https://shotstack-assets.s3.amazonaws.com/luma-mattes/effects/popup.mp4"
                        },
                        "start": 0.5,
                        "length": 5
                    },
                    {
                        "asset": {
                            "type": "html",
                            "html": "<div><p><b>Scott Ko</b><br>ColourSpace Galleries</p></div>",
                            "css": "p { font-family: \"Manrope Light\"; font-size: 20px; color: #ffffff; text-align: left; } b { font-family: \"Manrope ExtraBold\"; font-size: 26px; } div { margin: 60px; }",
                            "width": 400,
                            "height": 120,
                            "background": "#141414"
                        },
                        "start": 0.5,
                        "length": 5,
                        "position": "bottomLeft",
                        "offset": {
                            "x": 0.05,
                            "y": 0.1
                        },
                    	"transition": {
                    		"out": "fade"
                    	}
                    }
                ]
            },
            {
                "clips": [
                    {
                        "asset": {
                            "type": "video",
                            "src": "https://github.com/shotstack/test-media/raw/main/captioning/scott-ko.mp4",
                            "volume": 1
                        },
                        "start": 0,
                        "length": 25.868
                    }
                ]
            }
        ]
    },
    "output": {
        "format": "mp4",
        "resolution": "sd"
    }
}
The final result is shown below:
Following this tutorial you could easily set up a template that accepts different presenter names and videos to ensure your business always creates videos that adhere to your brand and style guides. This can be set up to work automatically from a script or integration all without opening After Effects or Premiere.
Get started with Shotstack's video editing API in two steps:
- Sign up for free to get your API key.
- Send an API request to create your video:
curl --request POST 'https://api.shotstack.io/v1/render' \
--header 'x-api-key: YOUR_API_KEY' \
--data-raw '{
  "timeline": {
    "tracks": [
      {
        "clips": [
          {
            "asset": {
              "type": "video",
              "src": "https://shotstack-assets.s3.amazonaws.com/footage/beach-overhead.mp4"
            },
            "start": 0,
            "length": "auto"
          }
        ]
      }
    ]
  },
  "output": {
    "format": "mp4",
    "size": {
      "width": 1280,
      "height": 720
    }
  }
}'


Experience Shotstack for yourself.
- Seamless integration
- Dependable high-volume scaling
- Blazing fast rendering
- Save thousands