Shotstack provides designers with an online video editor built specifically for automation and personalisation. It follows the principals of a timeline based desktop video editor like Adobe Premiere or DaVinci Resolve allowing video clips, images, audio and text to be sequenced and organised.
Tracks allow elements to be layered on top of each other. More advanced features include support for alpha channels, track mattes and masks.
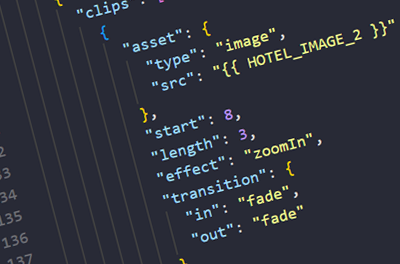
One feature that makes Shotstack unique is merge fields, allowing you to create dynamic videos by replacing text, videos and images in bulk. For example, you can assign a placeholder to text and insert a user’s name, or dynamically replace photos to create a slideshow for hundreds of products.
This guide will detail each of the key design features along with how to edit and save designs using the Studio editor with details of how to prepare a template for use via an API call.
Studio Editor
The easiest way to design video templates is using the Studio. The Studio is a drag and drop design interface with a live preview, timeline view and media management panel. The Studio lets you upload videos, images and audio, scale and position them and arrange them on a timeline. You can also apply text, overlays, masks, transitions and built in motion effects to bring designs to life.
Using the editor you can design videos, images and even edit audio. Videos can be designed in common sizes such as 16:9 widescreen, vertical and square video and for both images and video you can set any custom size. Output formats include mp4, gif, jpg, png and mp3. To modify the output settings of a design click on the cog icon ![]() .
.

The Studio video editing interface showing the main panels
You can test how your video will look when rendered by clicking on the render button in the top right hand corner. This will generate the video as an actual mp4 file, image or video and let you check the final render.
Timeline
The timeline panel lets you organise and sequence media assets (clips) over time. For each clip you can set the start time and duration. The start time marks where on the timeline the clip will play from, and duration sets how long the clip will play for.
You can adjust the start time of clip by dragging it across the timeline or in the asset panel start field. The duration can be adjusted by dragging the right hand side of the clip or in the asset panel length field. Adjusting the duration (length) trims the end of the clip. To trim the start, drag the left hand side of the clip or in the asset panels trim field.
Clips can be layered on top of each other, for example, you might want to place text on top of a video clip or image.
Using the timeline to edit a clip
Assets
Videos are composed of various media files which we call assets. When an asset is added to a the timeline we call it a clip and occasionally we refer to each of these interchangeably.
The following assets types are supported:
- Video - import source footage in a range of formats and sizes.
- Images - import images in a range of formats and sizes.
- Audio - import audio in a range of formats and sizes.
- Text - input, style and position text to create titles and copy.
- Overlay - import video and image files with alpha channels.
- Masks - import video and image luma mattes to apply track matte masks.
Each of the assets types are added to the timeline using the icon buttons in the track, that look like this:
![]()
Once added an empty clip will appear in the timeline and the asset panel will be displayed on the right hand side. From this panel you can upload files and edit properties.
Each clip can have their start and length adjusted. Video, audio, overlays and masks can also be trimmed. All assets, except audio, can be modified in the preview using drag and drop to adjust their position and scale. Transitions and motion effects can be applied to videos, images, text and overlays. Audio assets can have fade transitions added to them. Text assets have a range of settings to set their styling including fonts, font size, colour and bounding box.

Asset panel and properties
Tracks and layers
When designing layouts you will want to layer assets on top of each others, for text on top of an overlay on top of a background video clip to create a lower thirds effect.
To do this you use tracks. Tracks are a familiar feature in non linear video editors and are similar to layers in photo editing software like Photoshop.
Tracks are added in the timeline by clicking on the Add Track button. The order of tracks determines the order that clips are displayed. The top most track in the timeline will display over the tracks below it. There is no limit to the number of tracks you can add to a design.
Adding a track and adjusting the layering order
Merge fields and placeholders
The Studio editor is especially designed to create dynamic videos. This is done using merge fields, which is similar to the mail merge feature in word processors like Word or email tools like Mailchimp. Merge fields let you dynamically create videos at scale using our video editing API and workflows.

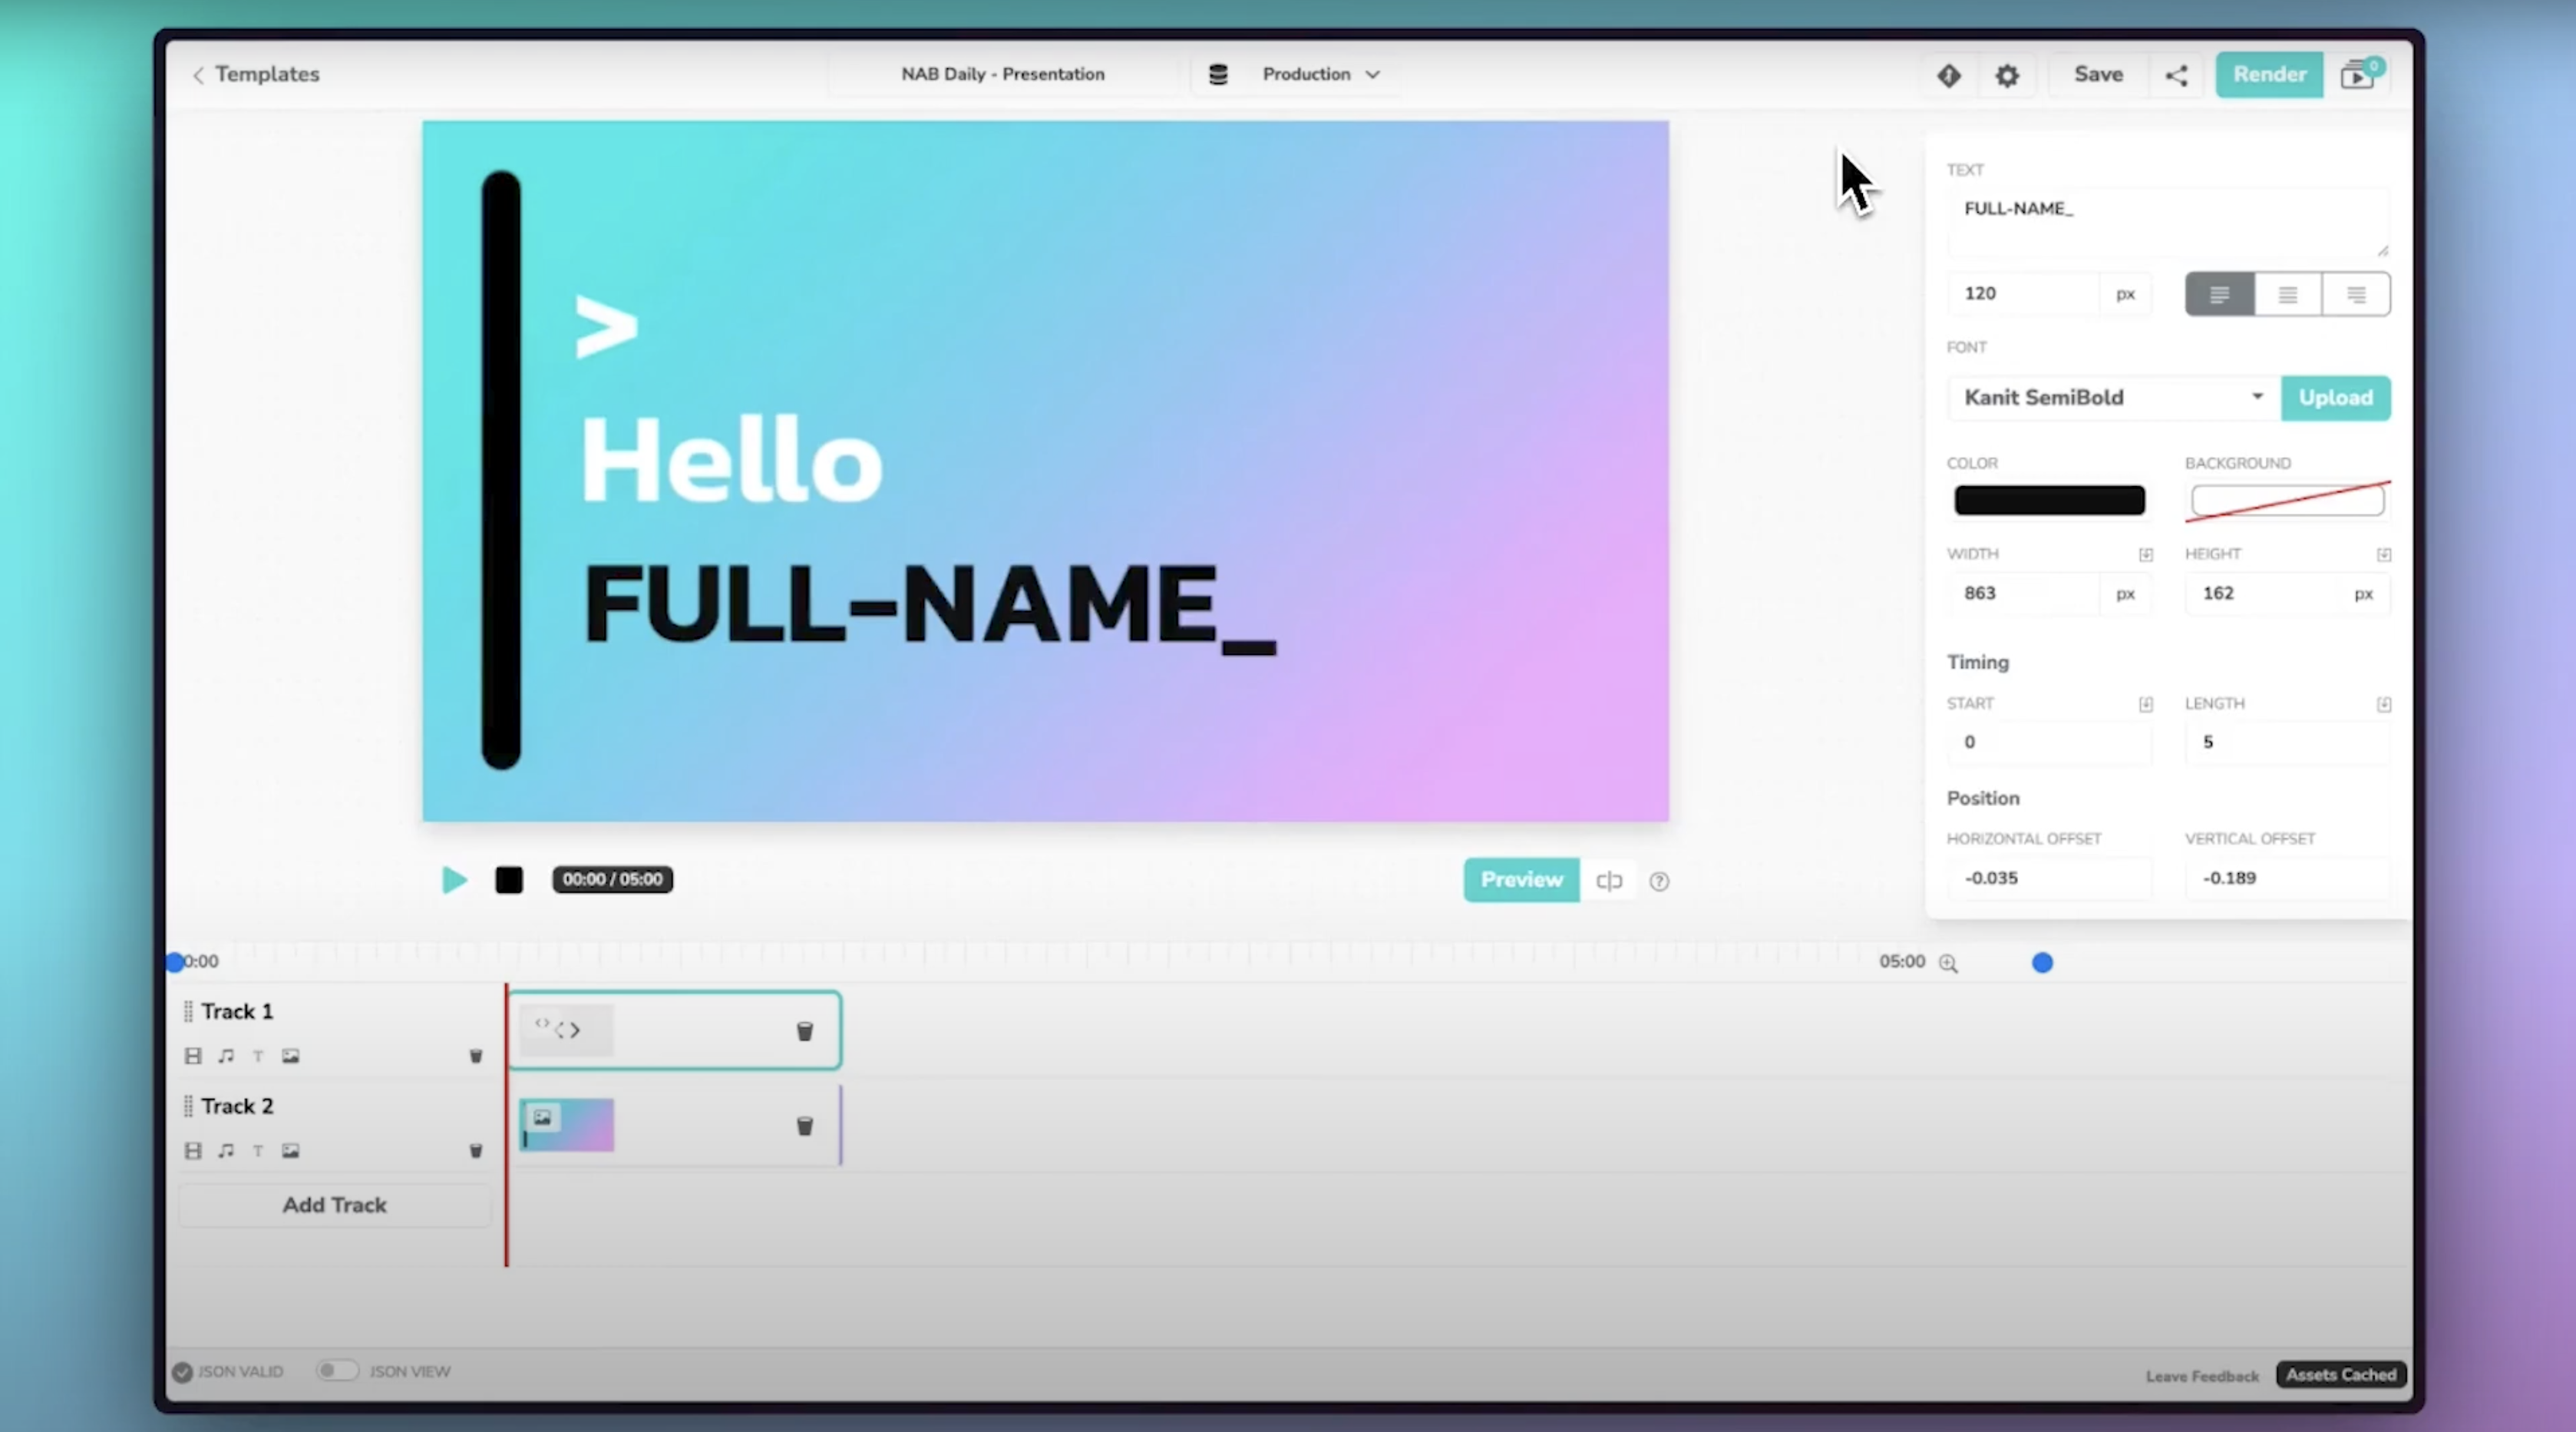
Click the merge fields button to add merge fields
To add a merge field, click on the Merge button. In the panel that opens set a name and a test value. We often refer to the name as a placeholder. For example, to personalise a video with a users name, you might set the name to FIRSTNAME. A common convention is to use uppercase characters without spaces. In the value field enter your own name, i.e. Jeff.
You can also use merge fields to dynamically set the URL of a video clip or image or set the start time and length to dynamically set the start or duration of a clip.

The merge fields panel for managing merge fields
Once the merge fields are set up, they can be assigned to properties within the design. For example, to assign our name to a text element, you could set the text in the text field to Hello {{ FIRSTNAME }}. You should see the preview update to display the title Hello Jeff, where Jeff is the first name you added in the merge fields panel.
For text assets you create a placeholder by wrapping the merge field name in double curly braces, like {{ NAME }}. The placeholder can be added anywhere in the text field along with other static text.
To assign URL’s or other merge fields to other asset properties use the {} icon next to he field in the asset panel. This will open a drop down list of all the merge fields, select the merge field you want to assign to this property. If you assign a URL to an image or video, the preview panel should update to display the new asset.
Creating text and titles
To add text to video click on the ![]() icon in the track you want to add text to. The clip will appear and load the asset panel. You can edit the text and insert placeholders if you are using merge fields to create dynamic videos.
icon in the track you want to add text to. The clip will appear and load the asset panel. You can edit the text and insert placeholders if you are using merge fields to create dynamic videos.
You can change the font by selecting from the drop down list of built in fonts. It is more likely however that you will want to import your own custom fonts. This is possible using the interface. Once the font is uploaded you can apply it to your text. We recommend uploading fonts in TTF format.
Text is contained within a bounding box. You can set the width and height by dragging the sides of the container in the preview or by editing the width and height values in the asset panel. Any text that overflows the bounding box will be hidden.
The bounding box is most useful for when you create dynamic videos. When setting the size keep in mind that the length of dynamic text might change and need to wrap on to multiple lines. Set the box large enough to display the longest amount of text you think you will need.
Working with animated overlays
An overlay animation with alpha transparency
The Shotstack Studio is a video editing tool like Adobe Premiere and not a motion graphics or animation tool like Adobe After Effects. While it includes some built in transitions and motion effects, it is designed to work with pre-rendered animations, footage, images and graphics.
The Studio does however support animations, motion graphics, shapes and assets that are pre-rendered and exported from software like Adobe After Effects or Adobe Animate.
Specifically, you can export motion graphics from After Effects as a QuickTime mov file with alpha transparency and then import those files in to the Studio and use them in your final renders. When imported alpha channels and transparency are preserved.
We call these types of assets overlays. Use the ![]() icon button from the track to add an overlay clip and upload a QuickTime move file. The overlay will normally be added to a track above other tracks. Once uploaded you should see the animation in the preview with transparent areas preserved.
icon button from the track to add an overlay clip and upload a QuickTime move file. The overlay will normally be added to a track above other tracks. Once uploaded you should see the animation in the preview with transparent areas preserved.
If you extend the duration of a clip longer than the actual duration of the uploaded file, the last frame is displayed. This can be used to your advantage to create lower thirds or panels that animate on to the screen, over the top of other assets and then remain on screen as a background for text and other elements.
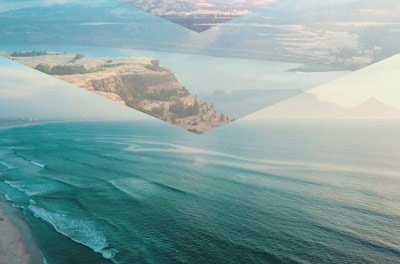
Overlays can also be used as animated transitions where one or two frames half way through the animation fill the screen and cut to a new scene. This tutorial shows you how to prepare an overlay transition in After Effects and use it in Shotstack as a transition.
A simple overlay transition created using After Effects
Track mattes and masking
A common technique in video editing and motion graphics is a track matte. A track matte is used to create a mask where one asset is displayed through the shape of another.
Shotstack only supports luma mattes - black/white and greyscale animated videos or images, where white areas create transparency and black areas are solid.
A luma matte is assigned to a track that creates a mask effect to any other asset on the track where the two assets overlap, like this:

A mask is added to the track and will mask the video asset in the same track
To add a luma mask to a track, click on the ![]() mask icon and upload the video or image via the asset panel. Shotstack supports videos (mp4 files are recommended) for animated masks and images (jpg or png) for still masks and shapes. There is a public gallery of luma mattes created by one of our users to help you get started.
mask icon and upload the video or image via the asset panel. Shotstack supports videos (mp4 files are recommended) for animated masks and images (jpg or png) for still masks and shapes. There is a public gallery of luma mattes created by one of our users to help you get started.
Using the Studio’s masking features is a great way to create transitions, from custom fades to complex animated shapes and windows. It is also a great way to create cut out text, borders and frames or to crop assets to simple shapes like a circles and rounded rectangles.
Working with shapes, vectors and graphics
Shotstack supports SVG vector graphics as well as PNG’s with transparency alpha channels. You can create shapes, panels, lower thirds and other graphics and export them as either either SVG or PNG (we’d recommend PNG) and import them as images.
To add an image clip and add shapes, click on the ![]() icon and upload the file via the image asset panel. Once uploaded the image will appear in the preview and can be position and scaled as required.
icon and upload the file via the image asset panel. Once uploaded the image will appear in the preview and can be position and scaled as required.

A background shape from Envato, saved as a PNG and uploaded to the editor
Built in motion effects, transitions and filters
While it is possible to create elaborate animations and motion graphics in other applications and import them in to Shotstack as overlays or track mattes, for simple animations, you can use one of the built in effects and transitions.
The built in motion effects and transitions allow you to add simple movement and transitions to videos, images and text. The limited collection allows you to add the most common animations you will find in videos such as fades and dissolves, Ken Burns effects for image slideshows, elegant text slides and carousel style transitions.
There are also built in filters which will apply simple colour correction and enhancements, invert and greyscale.
To apply the built in effects, transitions and filters click on the corresponding icons on the right hand side of the asset panel and then choose one of the options. Motion effects and transitions are also available in 3 speeds - normal, slow and fast.

Transitions panel showing built in transitions
At this time Shotstack does not support keyframes or custom animations, instead we recommend creating more advanced animations using motion graphics software like Adobe After Effects or Adobe Animate to create overlays, then combine these with the built in motion effects for elements like text and images.
Working with a developer
Once your template is designed you will want to make sure it is saved (hit the save button regularly), and then usable in a no-code workflow or via the editing API.
To work with a developer you can use the Code Snippet feature to provide a code example to help them get started with the API.
There is a code button in the top right corner next to the render button. This will open up a panel with code samples.
Ask your developer for their preferred programming language and using the code panel, select the language and copy/paste the code snippet to send to them.

Code snippet panel with code example
Working with no-code workflows
Shotstack offers a no-code media workflow tool that lets you rapidly build applications and workflows without having to write code, study API documentation or set up any SDK’s.
You can use your template design in a workflow by passing it data from a spreadsheet or webhook to generate thousands of personalised videos and variations. All of this can be setup and configured using the Workflows point and click interface.

Create applications and workflows without writing any code
Get creating!
Using the tools, features and concepts described in this article, you should now be able to create high quality videos, images and even audio templates to generate one or 1 million videos.
Shotstack provides a highly capable suite of editing features that is complimented and enhanced with other tools like Adobe After Effects and Photoshop. Using these tools together will allow you to create videos to a professional level and expand the creative possibilities of automated video production.
Get started with Shotstack's video editing API in two steps:
- Sign up for free to get your API key.
- Send an API request to create your video:
curl --request POST 'https://api.shotstack.io/v1/render' \
--header 'x-api-key: YOUR_API_KEY' \
--data-raw '{
  "timeline": {
    "tracks": [
      {
        "clips": [
          {
            "asset": {
              "type": "video",
              "src": "https://shotstack-assets.s3.amazonaws.com/footage/beach-overhead.mp4"
            },
            "start": 0,
            "length": "auto"
          }
        ]
      }
    ]
  },
  "output": {
    "format": "mp4",
    "size": {
      "width": 1280,
      "height": 720
    }
  }
}'


Experience Shotstack for yourself.
- Seamless integration
- Dependable high-volume scaling
- Blazing fast rendering
- Save thousands