
 Claude
 ChatGPT
 Perplexity
 Google AI
Contents
Your product pages already have everything a short video needs: photos, a title, a price and a description. Shotstack for Shopify uses them to make Shopify product videos right inside your admin, and adds each finished video to its product page with one click.
The app is now available as a preview on the Shopify App Store, so you can install it and start using it today. Because it’s a preview, it will keep changing as we hear from the stores using it, and some screens may look slightly different from the ones in this guide.
Watch the app in action:
Why video belongs on a product page
Online shoppers can’t pick up your product or turn it over in their hands. Photos help, but a short video can show the product from more angles and highlight the details that matter.
That kind of content shapes buying decisions. In Salsify’s 2025 Consumer Research report, 77% of 1,910 shoppers in the US and UK said product images and videos are “extremely” or “very” important when deciding to complete a purchase.
The problem is time. A store with 200 products needs 200 videos, and making each one by hand means opening an editor, building a timeline and exporting a file.
The app does most of that for you. It fills in the photos, title, price and description from your listing, so you start with a ready-made video to adjust, not a blank timeline.
Before you start
You need two things: the app and a Shotstack account.
- Install Shotstack from the Shopify App Store, then open it from your Shopify admin.
- On the first screen, click Create a Shotstack account if you’re new to Shotstack, or I already have one to connect an existing account. Your videos are rendered on that account.

Previewing videos is always free. The account is only used when you make the final video file.
Make your first video in three steps
Open Make a video. The page takes you through three steps, shown as tabs across the top: products, design, and words and colors. A free preview stays on the right side of the page the whole time, so you can see your video as you build it.
Step 1: Choose your products
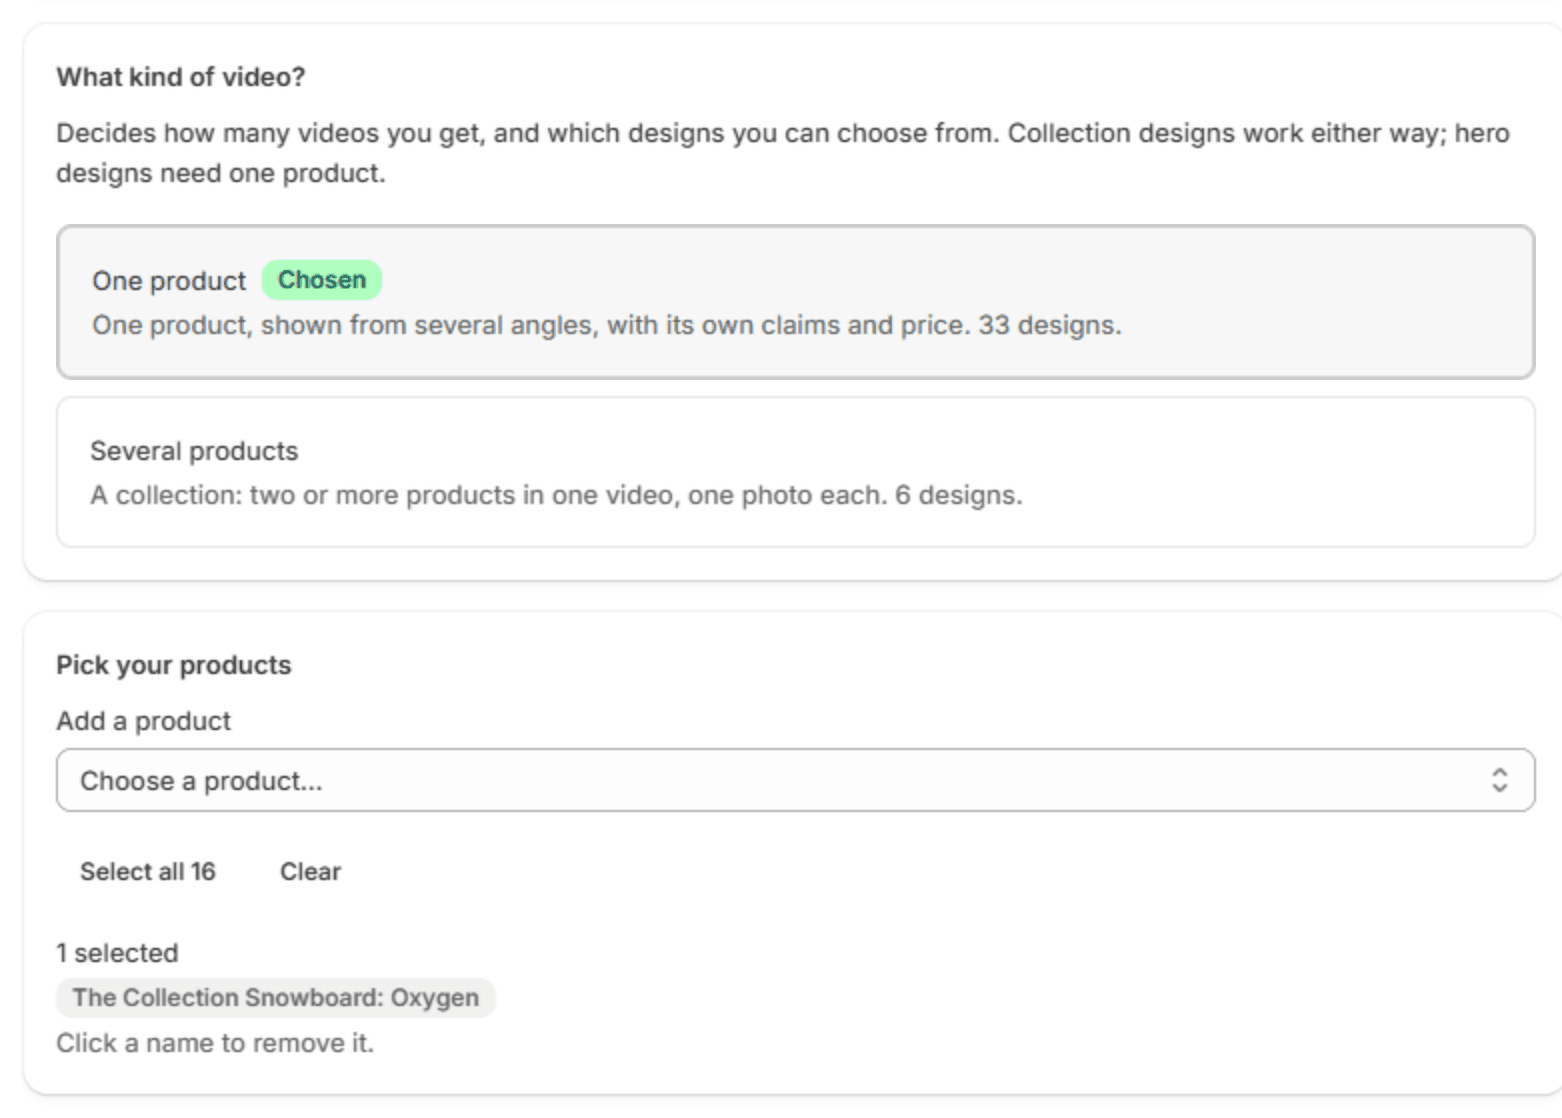
First, choose the type of video:
- One product focuses on a single product, showing it from several angles with its own claims and price.
- Several products makes one collection video with a photo of each product.
Next, pick the products. You can choose one, several or all of them. With One product, you get a separate video for each product you choose.
Step 2: Choose a design
Pick a design from Shotstack’s gallery of ready-made e-commerce designs. As of November 2026, there are 33 for single products and 6 for collections. If you’ve built your own template in Shotstack Studio, press Refresh designs and you’ll find it under Custom template. Studio’s template gallery is a good place to start one.
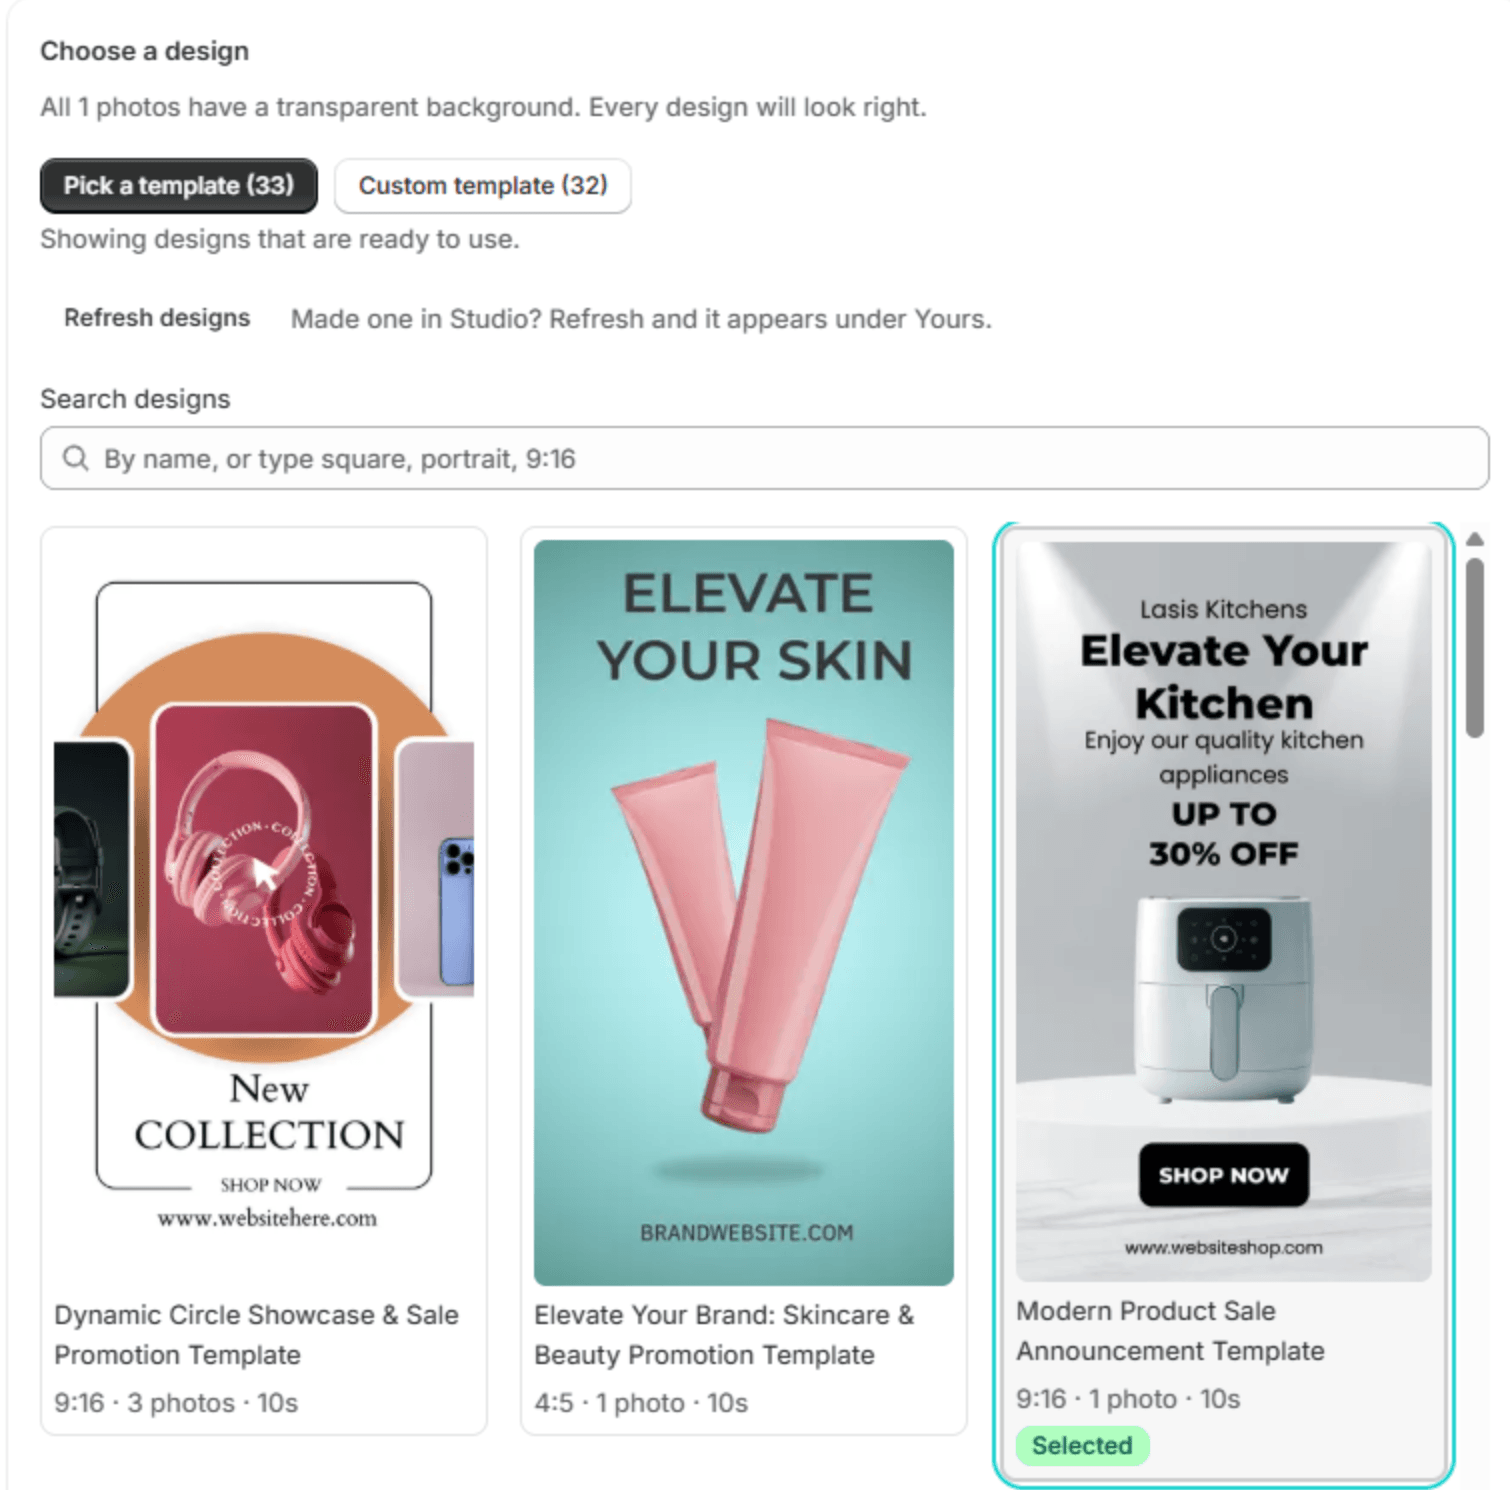
As you choose, check three things:
- Shape. Each design has one fixed shape, matched to where the video will play. Most are 9:16, for Reels and TikTok, and a few are 4:5, for feed posts. To filter by shape, type “portrait” or “9:16” into the search box.
- Your photos. Designs that place the product on a colored background show a photo shot on white as a white box, so the app flags those photos. Removing the background in step 3 fixes it.
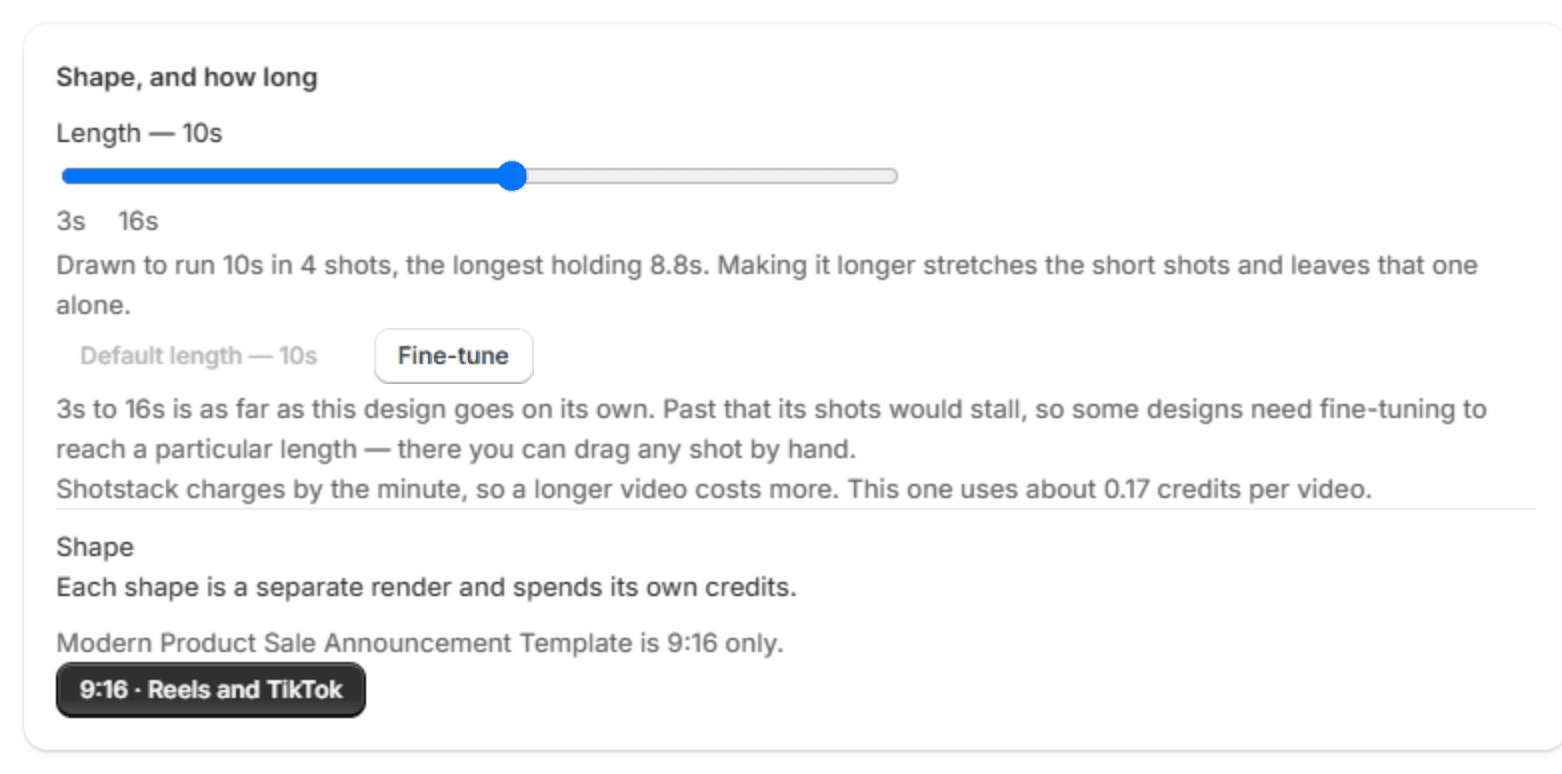
- Length. Below the gallery, most designs have a slider with their own range, such as 3 to 16 seconds. A few run at a fixed length, which you can change by hand with Fine-tune. Either way, the app shows the cost of one video before you make it.
Step 3: Check the words, colors, and photos
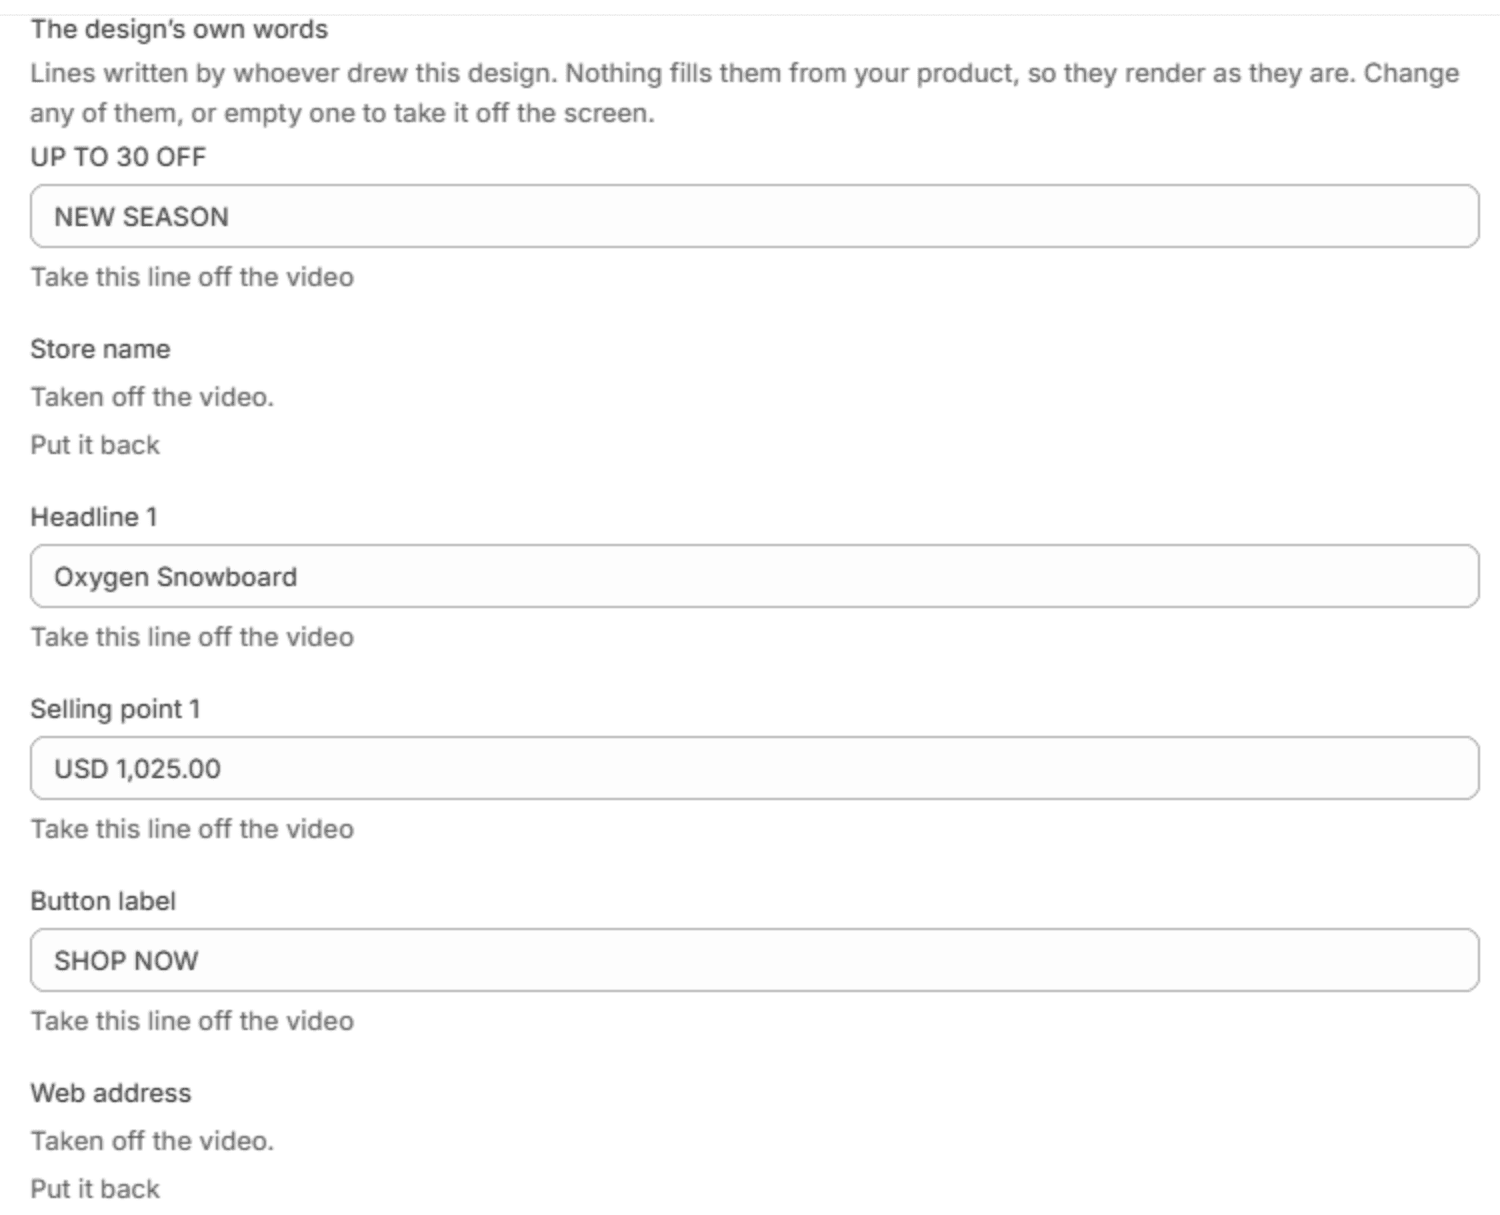
This step is optional: the app has already filled in the text from your listing. Read it through before you make the video, because what you see here is what renders.
Want to replace all the text at once? Use one of the two buttons:
- Get info from the product listing pulls the text from your listing again, for free.
- Let AI write the copy writes new on-screen wording. The AI is included in your plan and runs on Shotstack’s own model.
You can edit any line afterwards, or click Take this line off the video to remove it.
Below the text, you can change the design’s colors, or click Match my product photos to use colors from your photos.
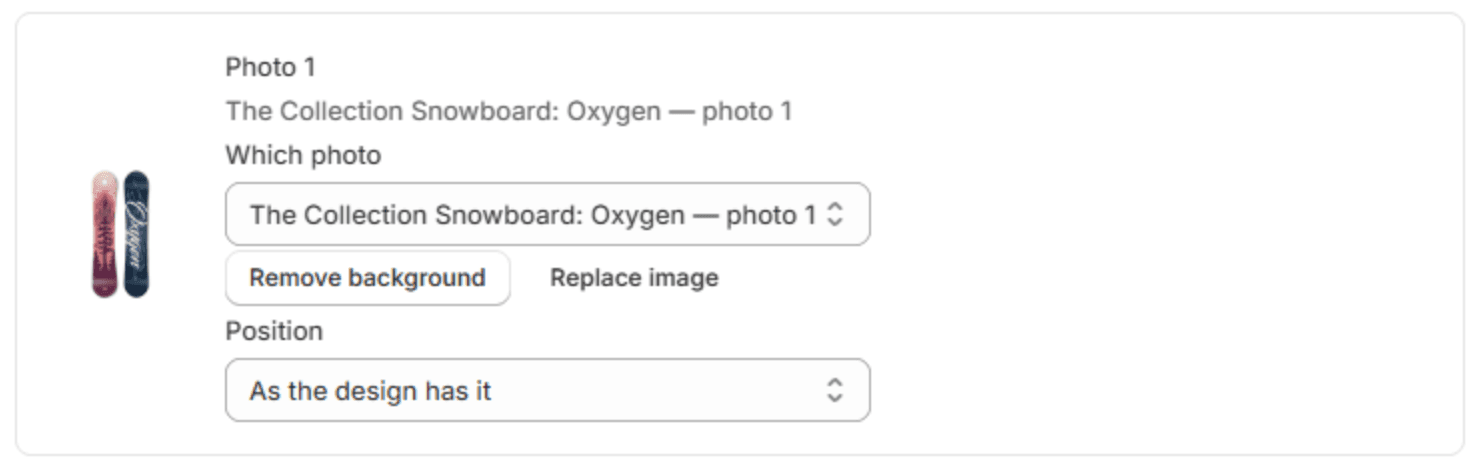
Finally, check the photos. Each slot shows which product photo the design uses, and you can:
- Switch to another of the product’s photos.
- Click Replace image to use a different one.
- Click Remove background to cut the product out. It’s free and only affects the video. The photo in your store stays exactly as it is.
Make the video and add it to your product
When you’re happy with the preview, click Make 1 video in the panel on the right. When it’s ready, the video appears under Just made, with three options:
- Watch full size to check the finished video.
- Download to save the file, for example, for a social post.
- Add to product to put the video in the product’s media in your Shopify admin, next to your photos. Shopify takes a minute or two to process it, and from then on it belongs to your store.
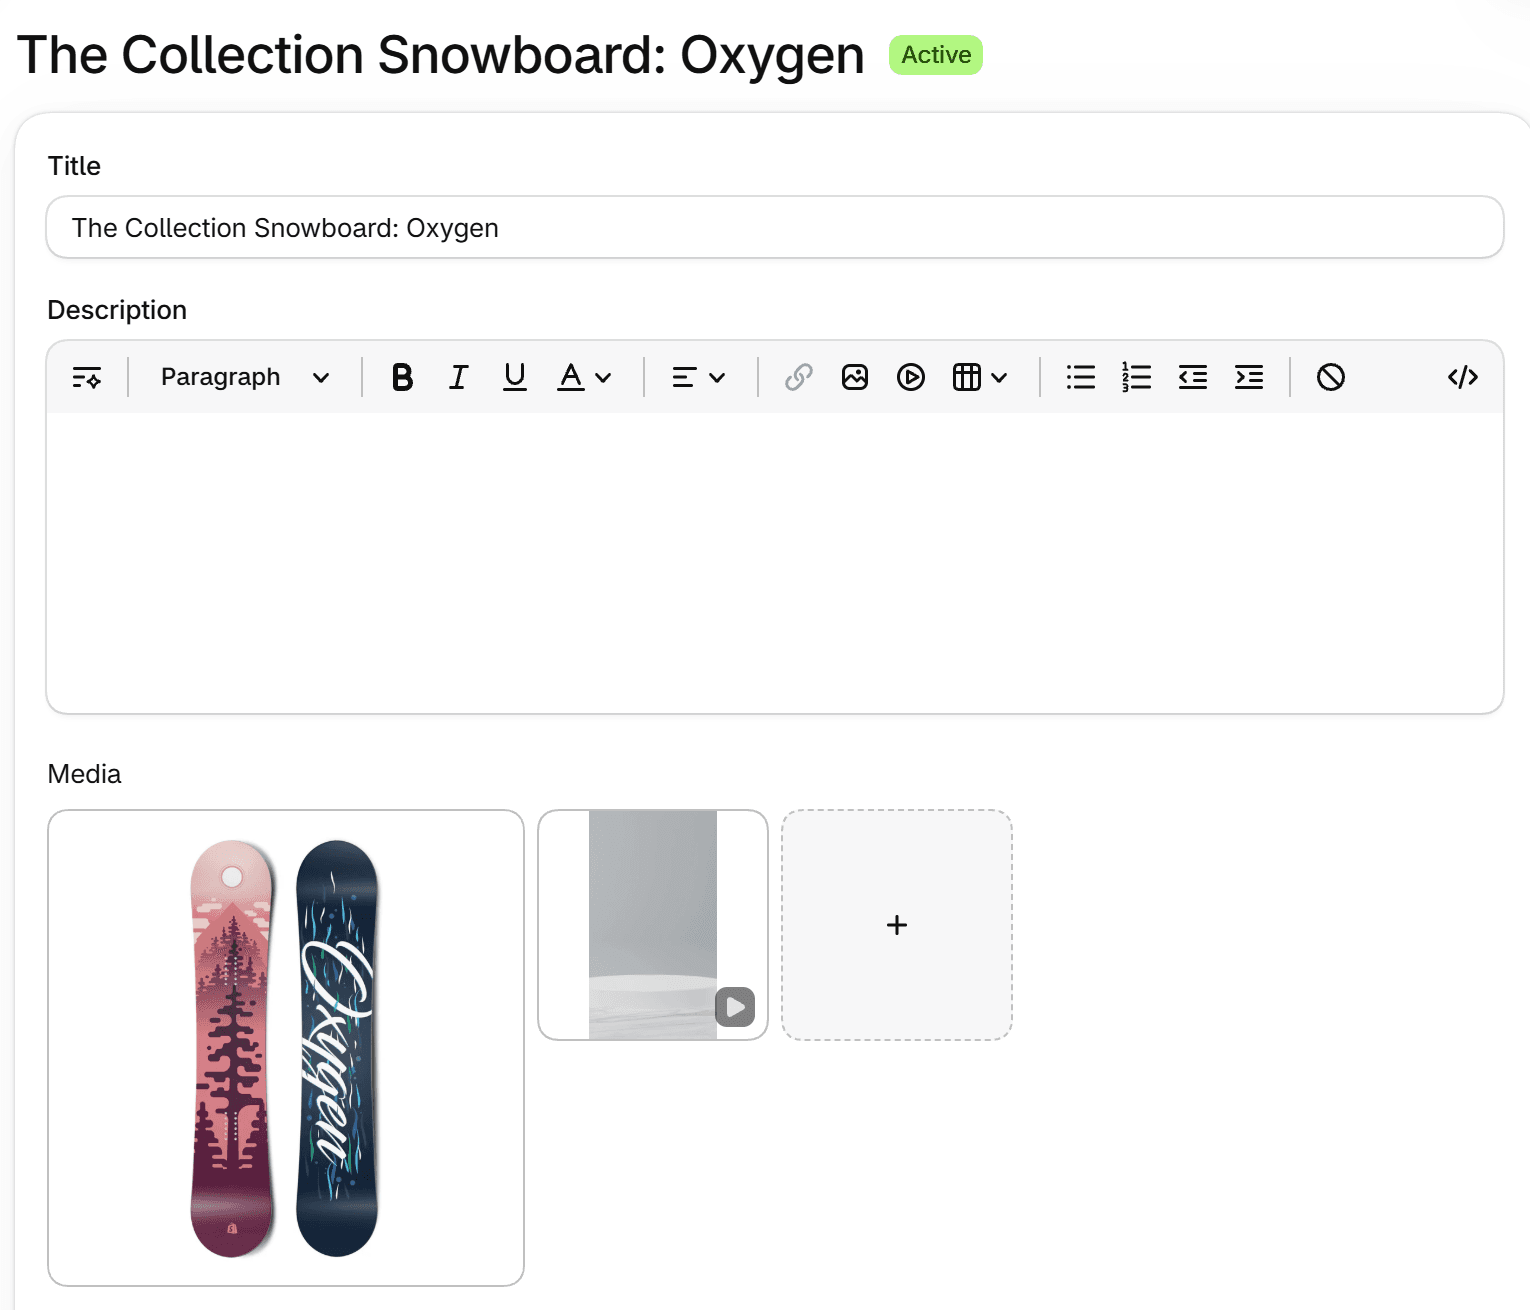
Add each video to its product soon after you make it. Shotstack only keeps finished videos for a limited time. After that, you can’t play, download or add them to a product. You’ll find every video you’ve made under Your videos.
What you get
Here’s what the app makes from a single product listing. This video uses a studio-style design, the product photo with its background removed, the product’s name and price, and a “new season” line.
It’s a 10-second vertical video, sized for Reels and TikTok.
5 tips for better videos
- Write a full product description. The AI writes the on-screen words from it. When a product has no description, the app asks you to fill in the headlines yourself.
- Remove white backgrounds. In designs with a colored background, a photo shot on white shows as a white box. Remove the background, and the product sits on the design’s own colors.
- Keep headlines short. They need to fit the design, and the app warns you when a line might be too long.
- Choose the shape for the channel. Each shape is a separate video, and each one counts toward your plan.
- Use the free preview. Try a few designs and lengths before you make the final video.
Videos for sales and seasonal campaigns
Planning a sale, like Black Friday or an end-of-season clearance? The gallery includes sale designs, such as flash-sale and percentage-off layouts, as well as holiday designs.
Enter your offer, such as the discount you’re running, in the Price or offer box. Then make the videos a few days before the sale starts, so they’re already on your product pages when shoppers arrive.
Pricing
You start with a free trial, which uses the free credits on your Shotstack account. When those run out, choose a plan under Account and billing in the app. As of November 2026, the plans are:
| Plan | Price | Video a month |
|---|---|---|
| Starter | $39 a month | 250 minutes (500 × 30-second videos) |
| Pro | $99 a month | 750 minutes (1,500 × 30-second videos) |
| Scale | $199 a month | 2,000 minutes (4,000 × 30-second videos) |
A few things to know about how plans work:
- Each video uses 30 seconds of your monthly minutes.
- Each shape counts as a separate video.
- When you choose a plan, Shopify shows you the charge and asks you to approve it. It then appears on your regular Shopify bill.
You’ll find current prices on the app listing.
What “preview” means
The app works today, and any video you add to a product stays in your store. The app itself will keep changing. We’ll add designs, remove ones that don’t work well, and adjust the steps as we learn from the stores using it. Some features may change or go away.
If something is missing or getting in your way, let us know through the Contact Shotstack link on the app’s Help page.
Put a video on every product page: try the preview
Your listings already have the photos and words a product video needs. Shotstack for Shopify turns them into finished videos without you leaving your Shopify admin. Pick your products, choose a design, check the words and add the video to the page. The free trial lets you try it on your own products before you pay.
Install Shotstack from the Shopify App Store.
New to Shotstack? Create a free Shotstack account, then connect it in the app with I already have one.
Frequently asked questions (FAQs)
Will the video play on my storefront?
It depends on your theme. According to Shopify, your theme needs to support 3D models and videos to show them in your online store.
If it doesn’t, you can switch to a theme that does, modify your current one, or check whether a newer version of your theme adds support. Shopify’s guide to adding 3D models and videos to products lists your options.
Can I use the app for my clients’ stores?
Yes. Install the app on each client’s store and connect each store to its own Shotstack account. Each store’s plan is billed separately, through that store’s Shopify bill.
What video files can a Shopify product hold?
Shopify accepts MP4, MOV and WebM files up to 1 GB in size and 10 minutes long, at resolutions up to 4K (4096 x 2160 px). It converts every video and delivers it to shoppers as MP4 or HLS. You’ll find the full requirements on Shopify’s product media types page.
What happens if I disconnect Shotstack?
Disconnecting immediately removes your Shotstack key and all render records from the app. Your Shotstack account isn’t deleted, and any videos you’ve already added to products stay in your store.

Written by
Jesus Rojas is a Growth Engineer at Shotstack, combining engineering and experimentation to help developers adopt video APIs. He builds onboarding experiences, lifecycle automation and analytics. Outside work, he enjoys making music and plays several instruments.
Published November 9, 2026